Cellular Failover with an Android Phone and Raspberry Pi
The great CenturyLink outage of late 2018 is under way. At the time of this writing, we're 16.5 hours in, and I'm tired of using my Android phone as a Wi-Fi hotspot. I want my network back up.
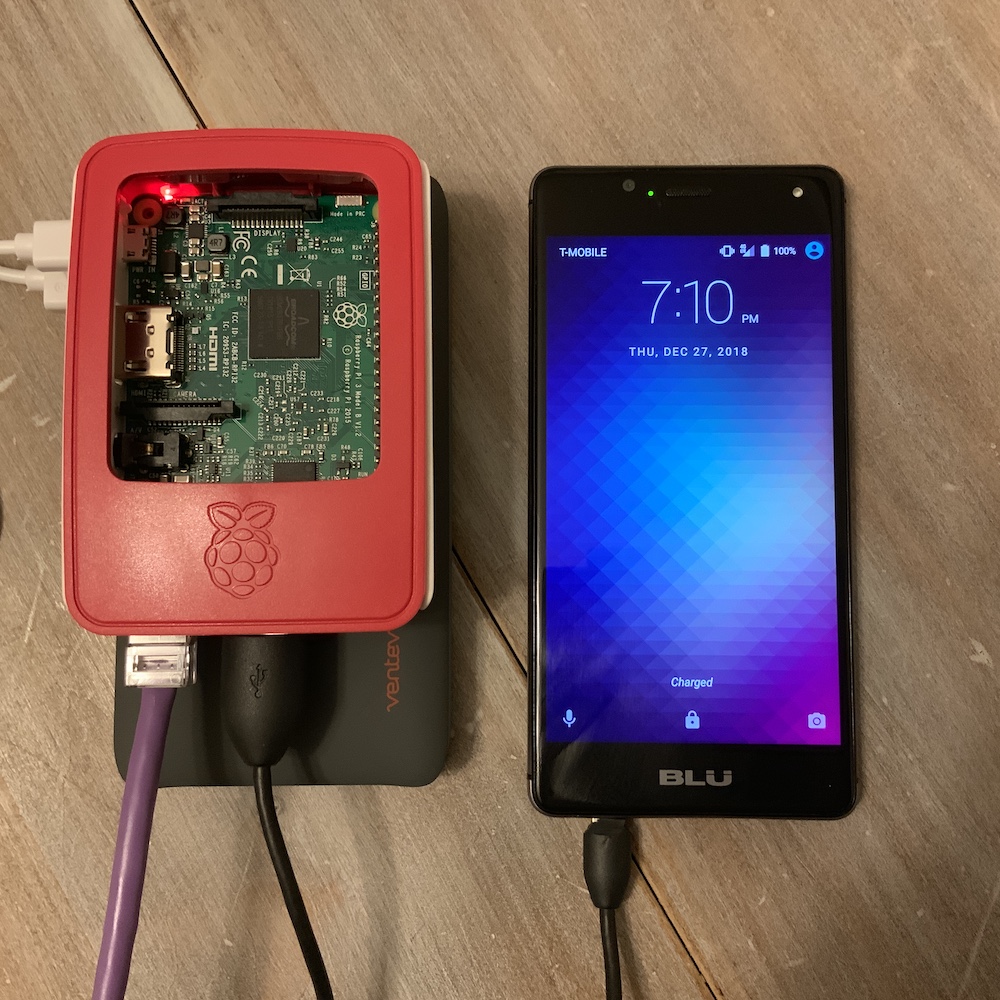
Fortunately, I have some tools to work with. I have a spare Android phone complete with an unlimited data plan (T-mobile ran a 3rd line for free promo a couple years ago) and a spare Raspberry Pi (seriously who doesn't have several of those kicking around). The idea here is that we can use the Raspberry Pi to turn that USB cell phone tether into ethernet, so our router can treat it basically like a modem.
Now in my setup, I have a "WAN2" port on my Ubiquiti UniFi Secure Gateway. If WAN1 goes down, the USG will automatically flop over to WAN2. You might have do to "manual failover" when your ISP goes down, but shoot, even my CenturyLink DSL modem has a configurable WAN2 port, so it all depends on your setup.
So let's get to work, and get some packets flowing on our network again.

Disclaimer: Infosec is a huge blind spot of mine. I'm nowhere close to competent with Linux. Exposing a Pi to the internet is scary to me. Proceed with caution.
Set up Raspbian
1. Download Raspbian Lite
2. Write it to an SD card with a tool like Etcher
3. Once it's done, eject and reattach the SD card so your OS will mount /boot
4. Grab this zip, and unzip the two files
4. From the .zip, drop ssh into /boot to enable SSH on the Pi
5. Optionally, you can also drop wpa_supplicant.conf into /boot, and edit the file with your WPA2 SSID and passphrase (you can skip this step if you are just gunna configure it with ethernet)
Set up the Bridge
1. Plug everything in
2. Enable USB tethering on your Android phone
3. SSH into your Raspberry Pi
4. Change the password:
passwd
5. If you want to check and ensure that the Raspberry Pi sees your phone, run:
dmesg | tail
6. If you want to be sure that usb0 shows up, run:
ifconfig
7. Install brctl (hilariously, this should work because you have WAN via usb0):
sudo apt-get install bridge-utils
8. Create the bridge:
sudo brctl addbr bridge0
9. Add usb0 and eth0 to the bridge:
sudo brctl addif bridge0 eth0
sudo brctl addif bridge0 usb0
10. Enable the bridge:
sudo brctl stp bridge0 on
11. If you've already set up your router/gateway, then expect to wait a couple of minutes for things to start working. I don't know why. If you haven't set up your router than read on.
Set up Your Router
On the WAN interface you plan to connect the Raspberry Pi to, configure it to DCHP (as opposed to PPPoE or Static). You might also want to set DNS to 1.1.1.1 and 1.0.0.1. If you happen to be running UniFi stuff like I am, you'll need to select the USG in Devices, go to the Ports tab, and click the Configure Interfaces link. Then, back to Settings and Networks to configure something like this:

Conclusion
After a few moments, all of your traffic should go through the Raspberry Pi. Keep in mind that if you need to reboot the Raspberry Pi for some reason, these settings won't stick. I think you could write a simple script to run those commands every time the Pi boots up. That's it!
Fortunately, I have some tools to work with. I have a spare Android phone complete with an unlimited data plan (T-mobile ran a 3rd line for free promo a couple years ago) and a spare Raspberry Pi (seriously who doesn't have several of those kicking around). The idea here is that we can use the Raspberry Pi to turn that USB cell phone tether into ethernet, so our router can treat it basically like a modem.
Now in my setup, I have a "WAN2" port on my Ubiquiti UniFi Secure Gateway. If WAN1 goes down, the USG will automatically flop over to WAN2. You might have do to "manual failover" when your ISP goes down, but shoot, even my CenturyLink DSL modem has a configurable WAN2 port, so it all depends on your setup.
So let's get to work, and get some packets flowing on our network again.
Disclaimer: Infosec is a huge blind spot of mine. I'm nowhere close to competent with Linux. Exposing a Pi to the internet is scary to me. Proceed with caution.
Set up Raspbian
1. Download Raspbian Lite
2. Write it to an SD card with a tool like Etcher
3. Once it's done, eject and reattach the SD card so your OS will mount /boot
4. Grab this zip, and unzip the two files
4. From the .zip, drop ssh into /boot to enable SSH on the Pi
5. Optionally, you can also drop wpa_supplicant.conf into /boot, and edit the file with your WPA2 SSID and passphrase (you can skip this step if you are just gunna configure it with ethernet)
Set up the Bridge
1. Plug everything in
2. Enable USB tethering on your Android phone
3. SSH into your Raspberry Pi
4. Change the password:
passwd
5. If you want to check and ensure that the Raspberry Pi sees your phone, run:
dmesg | tail
6. If you want to be sure that usb0 shows up, run:
ifconfig
7. Install brctl (hilariously, this should work because you have WAN via usb0):
sudo apt-get install bridge-utils
8. Create the bridge:
sudo brctl addbr bridge0
9. Add usb0 and eth0 to the bridge:
sudo brctl addif bridge0 eth0
sudo brctl addif bridge0 usb0
10. Enable the bridge:
sudo brctl stp bridge0 on
11. If you've already set up your router/gateway, then expect to wait a couple of minutes for things to start working. I don't know why. If you haven't set up your router than read on.
Set up Your Router
On the WAN interface you plan to connect the Raspberry Pi to, configure it to DCHP (as opposed to PPPoE or Static). You might also want to set DNS to 1.1.1.1 and 1.0.0.1. If you happen to be running UniFi stuff like I am, you'll need to select the USG in Devices, go to the Ports tab, and click the Configure Interfaces link. Then, back to Settings and Networks to configure something like this:

Conclusion
After a few moments, all of your traffic should go through the Raspberry Pi. Keep in mind that if you need to reboot the Raspberry Pi for some reason, these settings won't stick. I think you could write a simple script to run those commands every time the Pi boots up. That's it!
Comments
Post a Comment