Pebble Classic Battery Replacement
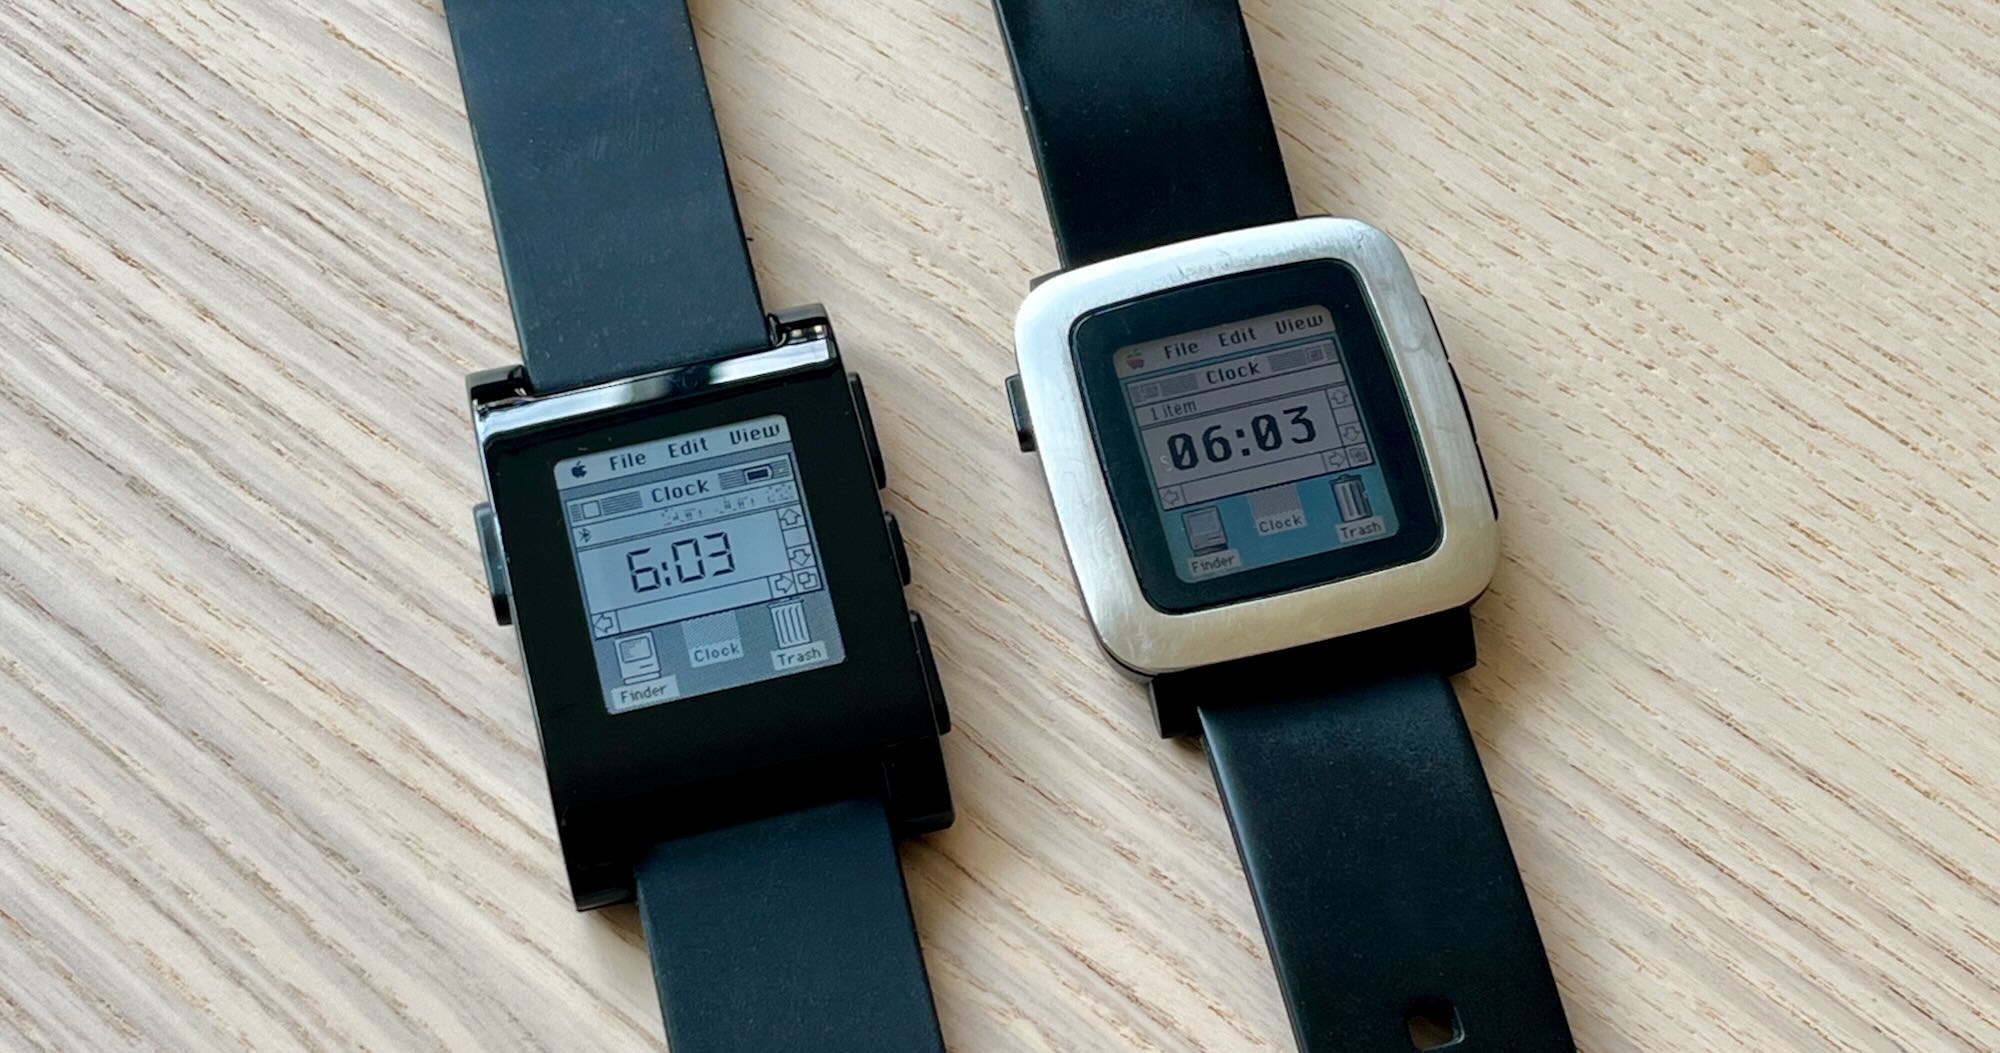
On Christmas day in 2013, I found a black Pebble smartwatch (now known as the Pebble Classic) under the Christmas tree. I was super excited about wearables such as Google Glass, and was thrilled to receive a Pebble from my wife for Christmas. Fast forward to 2025, and many things have happened, including Pebble going out of business and eventually coming back from the grave as Core Devices, with my wife and I placing an order for four (yes, four!) watches between the two of us.
While we anxiously wait for them to arrive, I picked up a Pebble Classic from a Redditor for 30€, which had a completely dead battery. The exact symptom that the watch mostly boots while connected to power, but instantly dies when power is removed.
I don’t feel that the battery replacement process is well-documented for these, hence this guide.
Glued Versus Screwed
The original batch of Pebble Classic watches (such as mine from 2013) is sealed with glue. I have yet to see good documentation showing a successful disassembly, battery replacement, and satisfactory reassembly of a glued Pebble Classic, so I have refrained from attempting to crack my first Pebble Classic open. That said, a user on Reddit gave this report:
I took the Pebble out and literally just lay it outside the house on a hot sunny weather (around 32°C-35°C) for around 4-5 hours (I vaguely remember, but I took the Pebble back inside at around 4-5ish PM) and then I blast the Pebble with a hairdryer for 15-30 mins, from there you’ll start to see that the right bottom corner is popping off so I peeled the screen off slowly with my bare fingernails.
So, while this might be possible with a glued Pebble Classic, this guide is really intended for units that use screws, which are readily available on eBay for around $30.
Battery
Supposedly, any 3.7v 402020 battery will work, but I ordered this specific battery from AliExpress for less than 10€.
Before You Begin
Before you get started, I recommend looking through these resources to best understand what you are getting into.
- iFixit Pebble Teardown. While this is for the glued Pebble, and shows it being disassembled from the front of the watch instead of the back, it’s great for very close-up photos of each component.
- Paul Lasky’s Pebble Battery Replacement Video. I am super appreciative of Paul’s video, which at the time of this writing remains the best guide for Pebble Classic battery replacement. That said, I attempted his method (which involves removing the backlight masking sticker and diffuser) on another Pebble Classic, and felt like it did more damage than it was worth. You have to peel up the backlight mask sticker (which will never stick down very well again), and you have to be pretty rough on the backlight diffuser to get it out. On a second attempt, I went in through the back of the inner assembly (instead of through the front like Paul does), and felt that it was much less invasive and risky.
Instructions
Note: The pictures don’t quite show the same order as the text. I’d recommend following the text.
Remove the four screws from the back, and use a soft pry tool tool to release the back cover, but do not fully remove the cover yet!
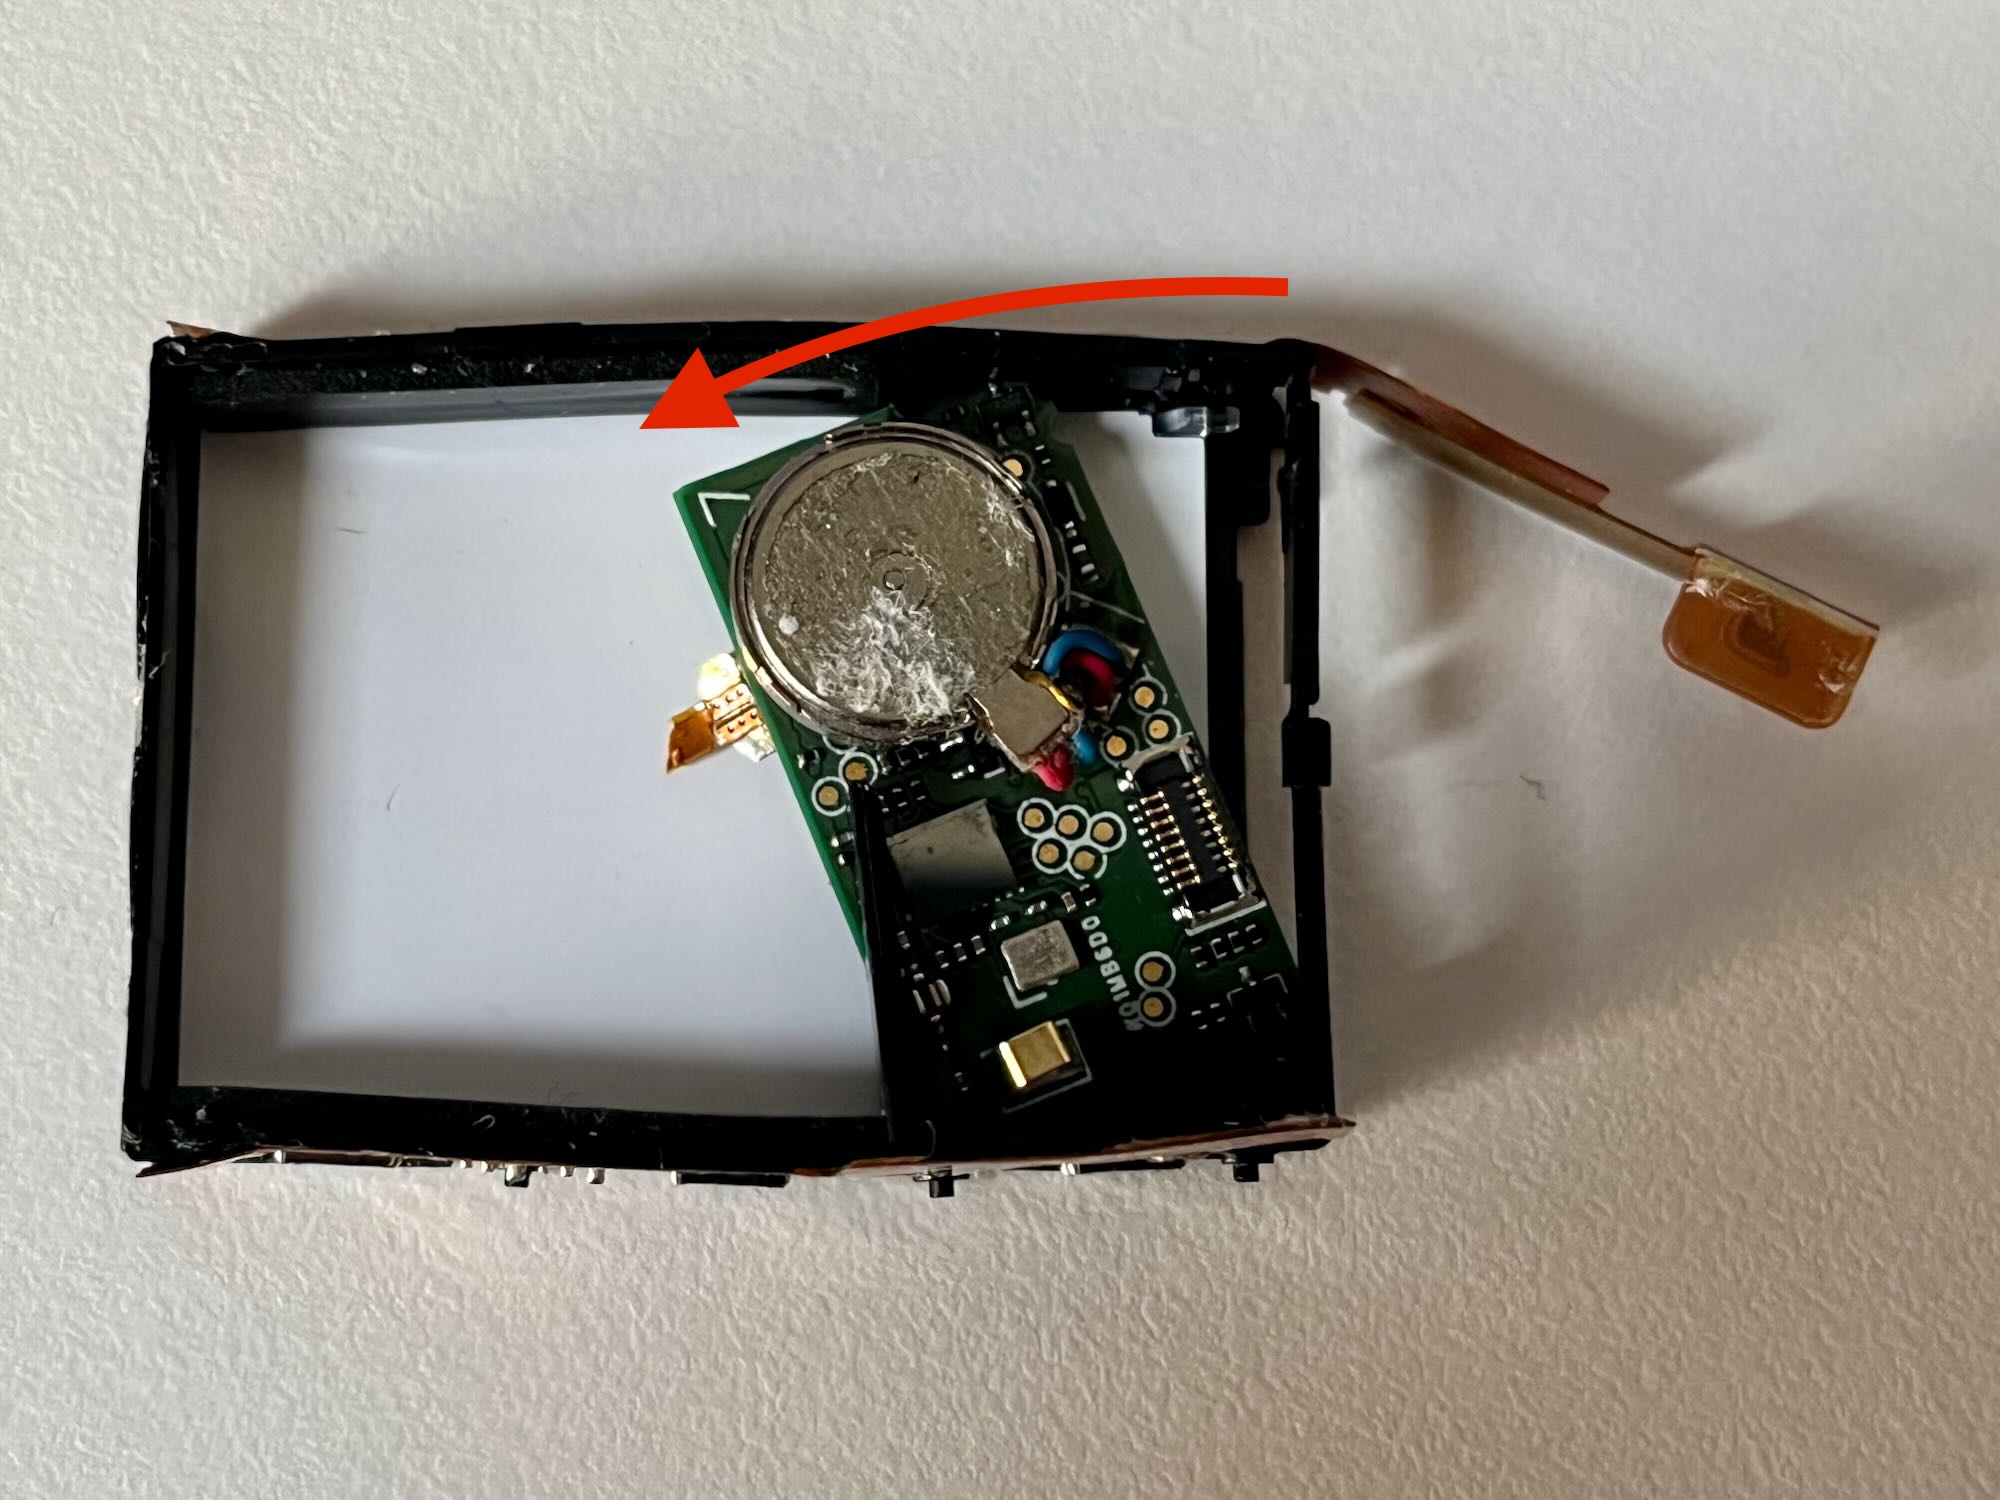
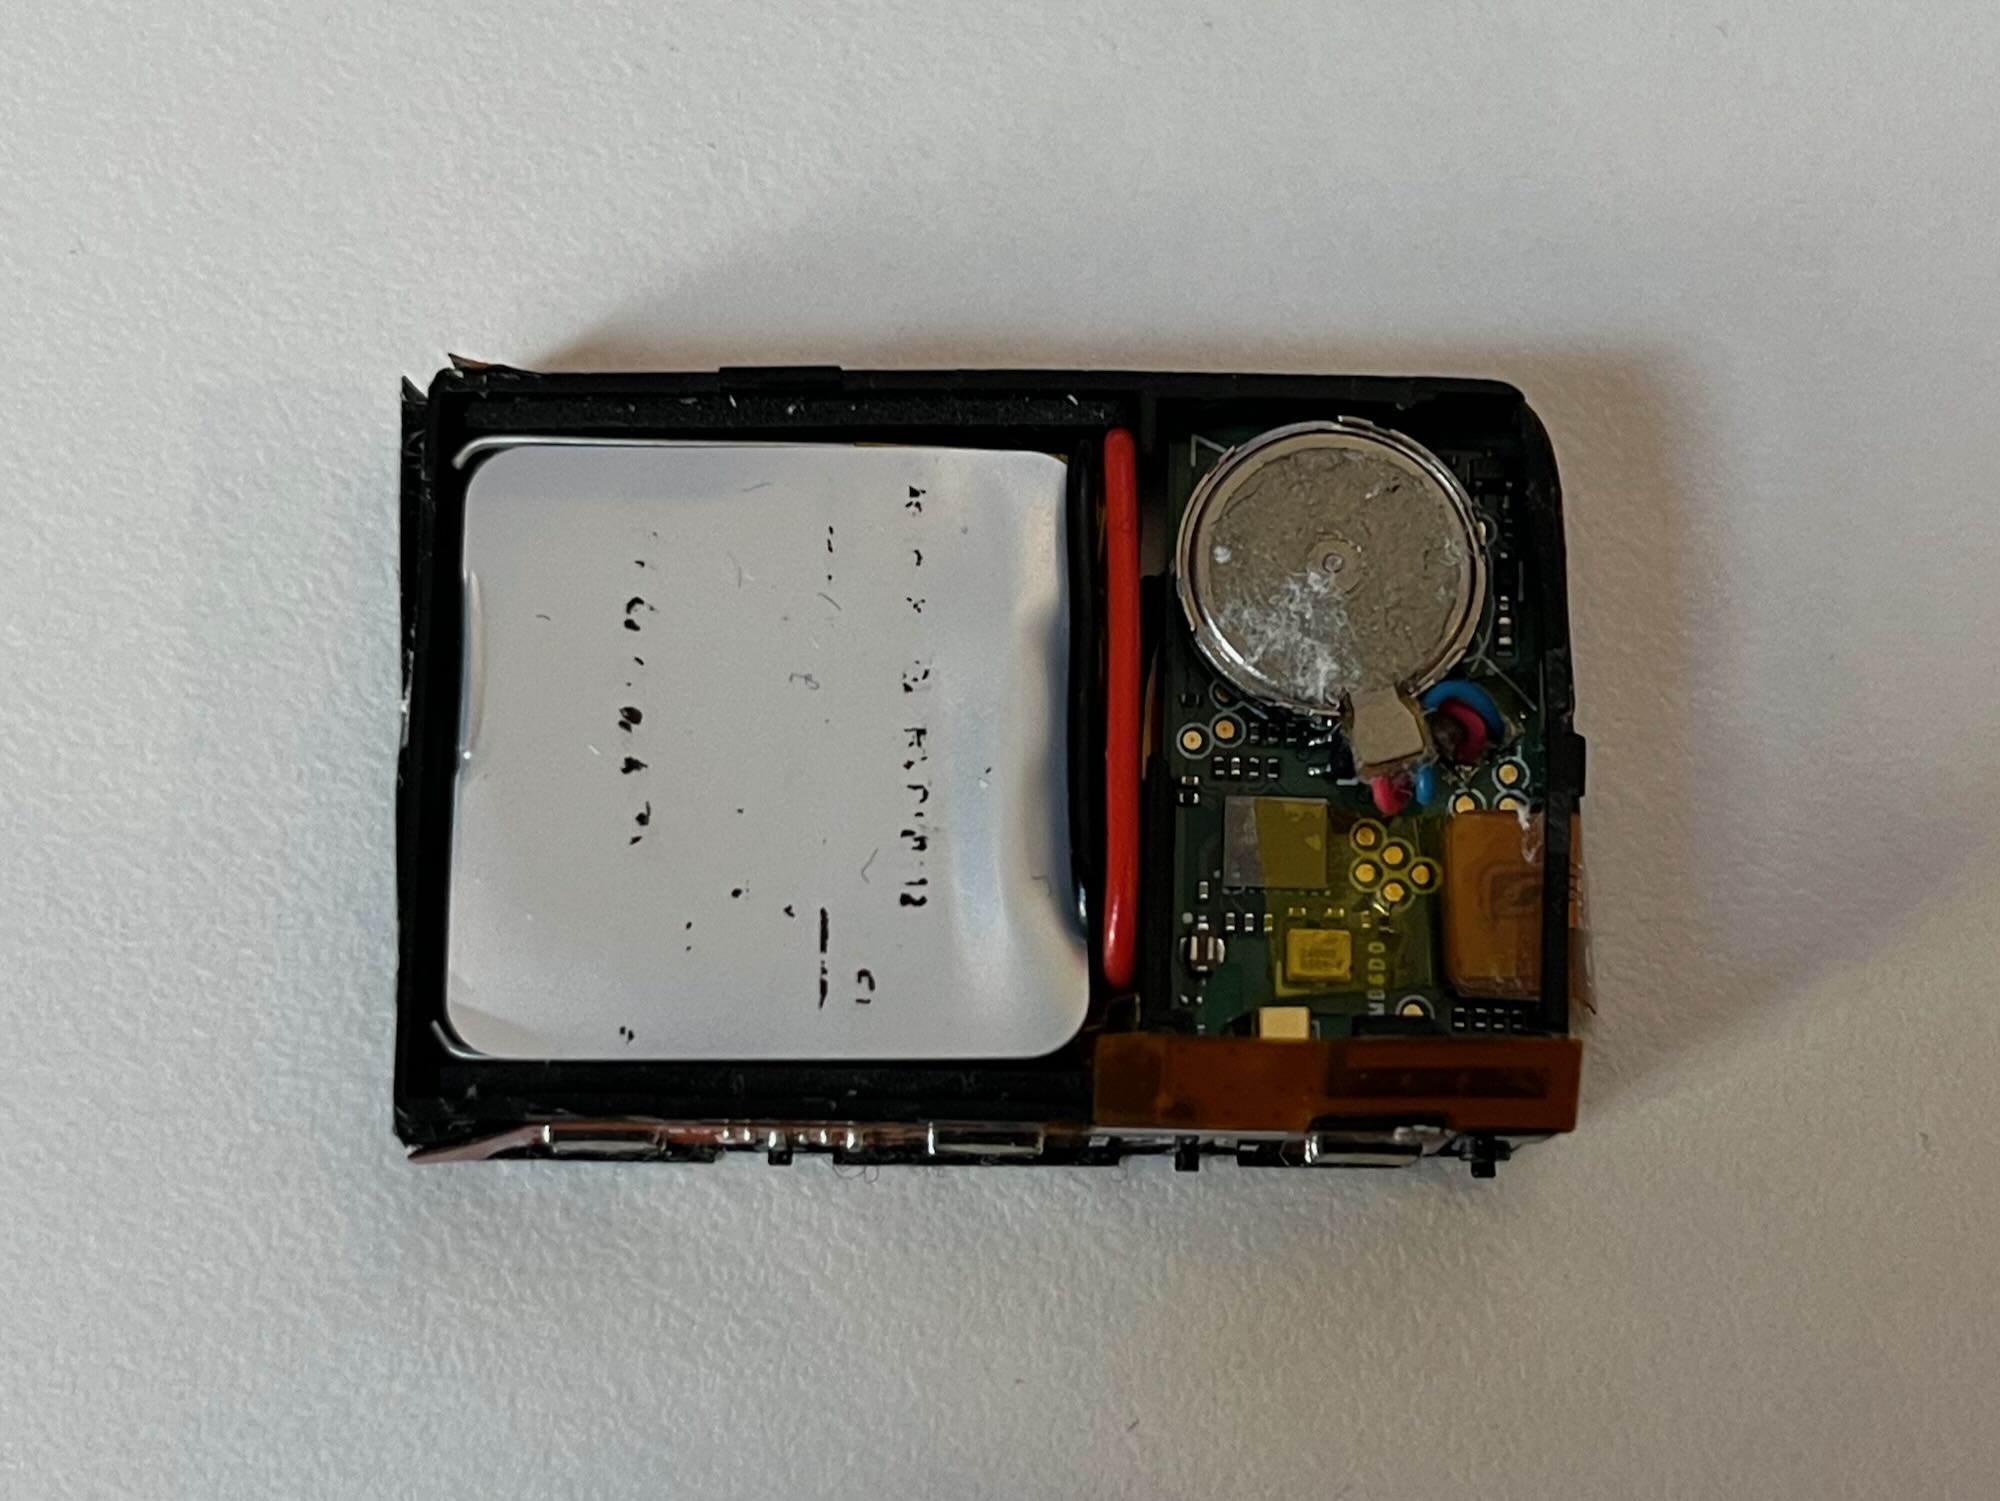
The haptic feedback motor is stuck to the back cover, but soldered to a circuit board inside the watch. Use a metal pry tool to free it from the back cover, before fully lifting the back cover away.
Warning: The haptic feedback motor has very fragile solder connections. Be careful that the motor doesn’t stick to anything and stress the wires or solder joints.
Gently pry up and lift away the battery with a soft-pry tool, being careful not to mar the backlight diffuser, which is below the battery. Note: Any pressure points on the backlight diffuser will be visisble as bright spots when the backlight is on.
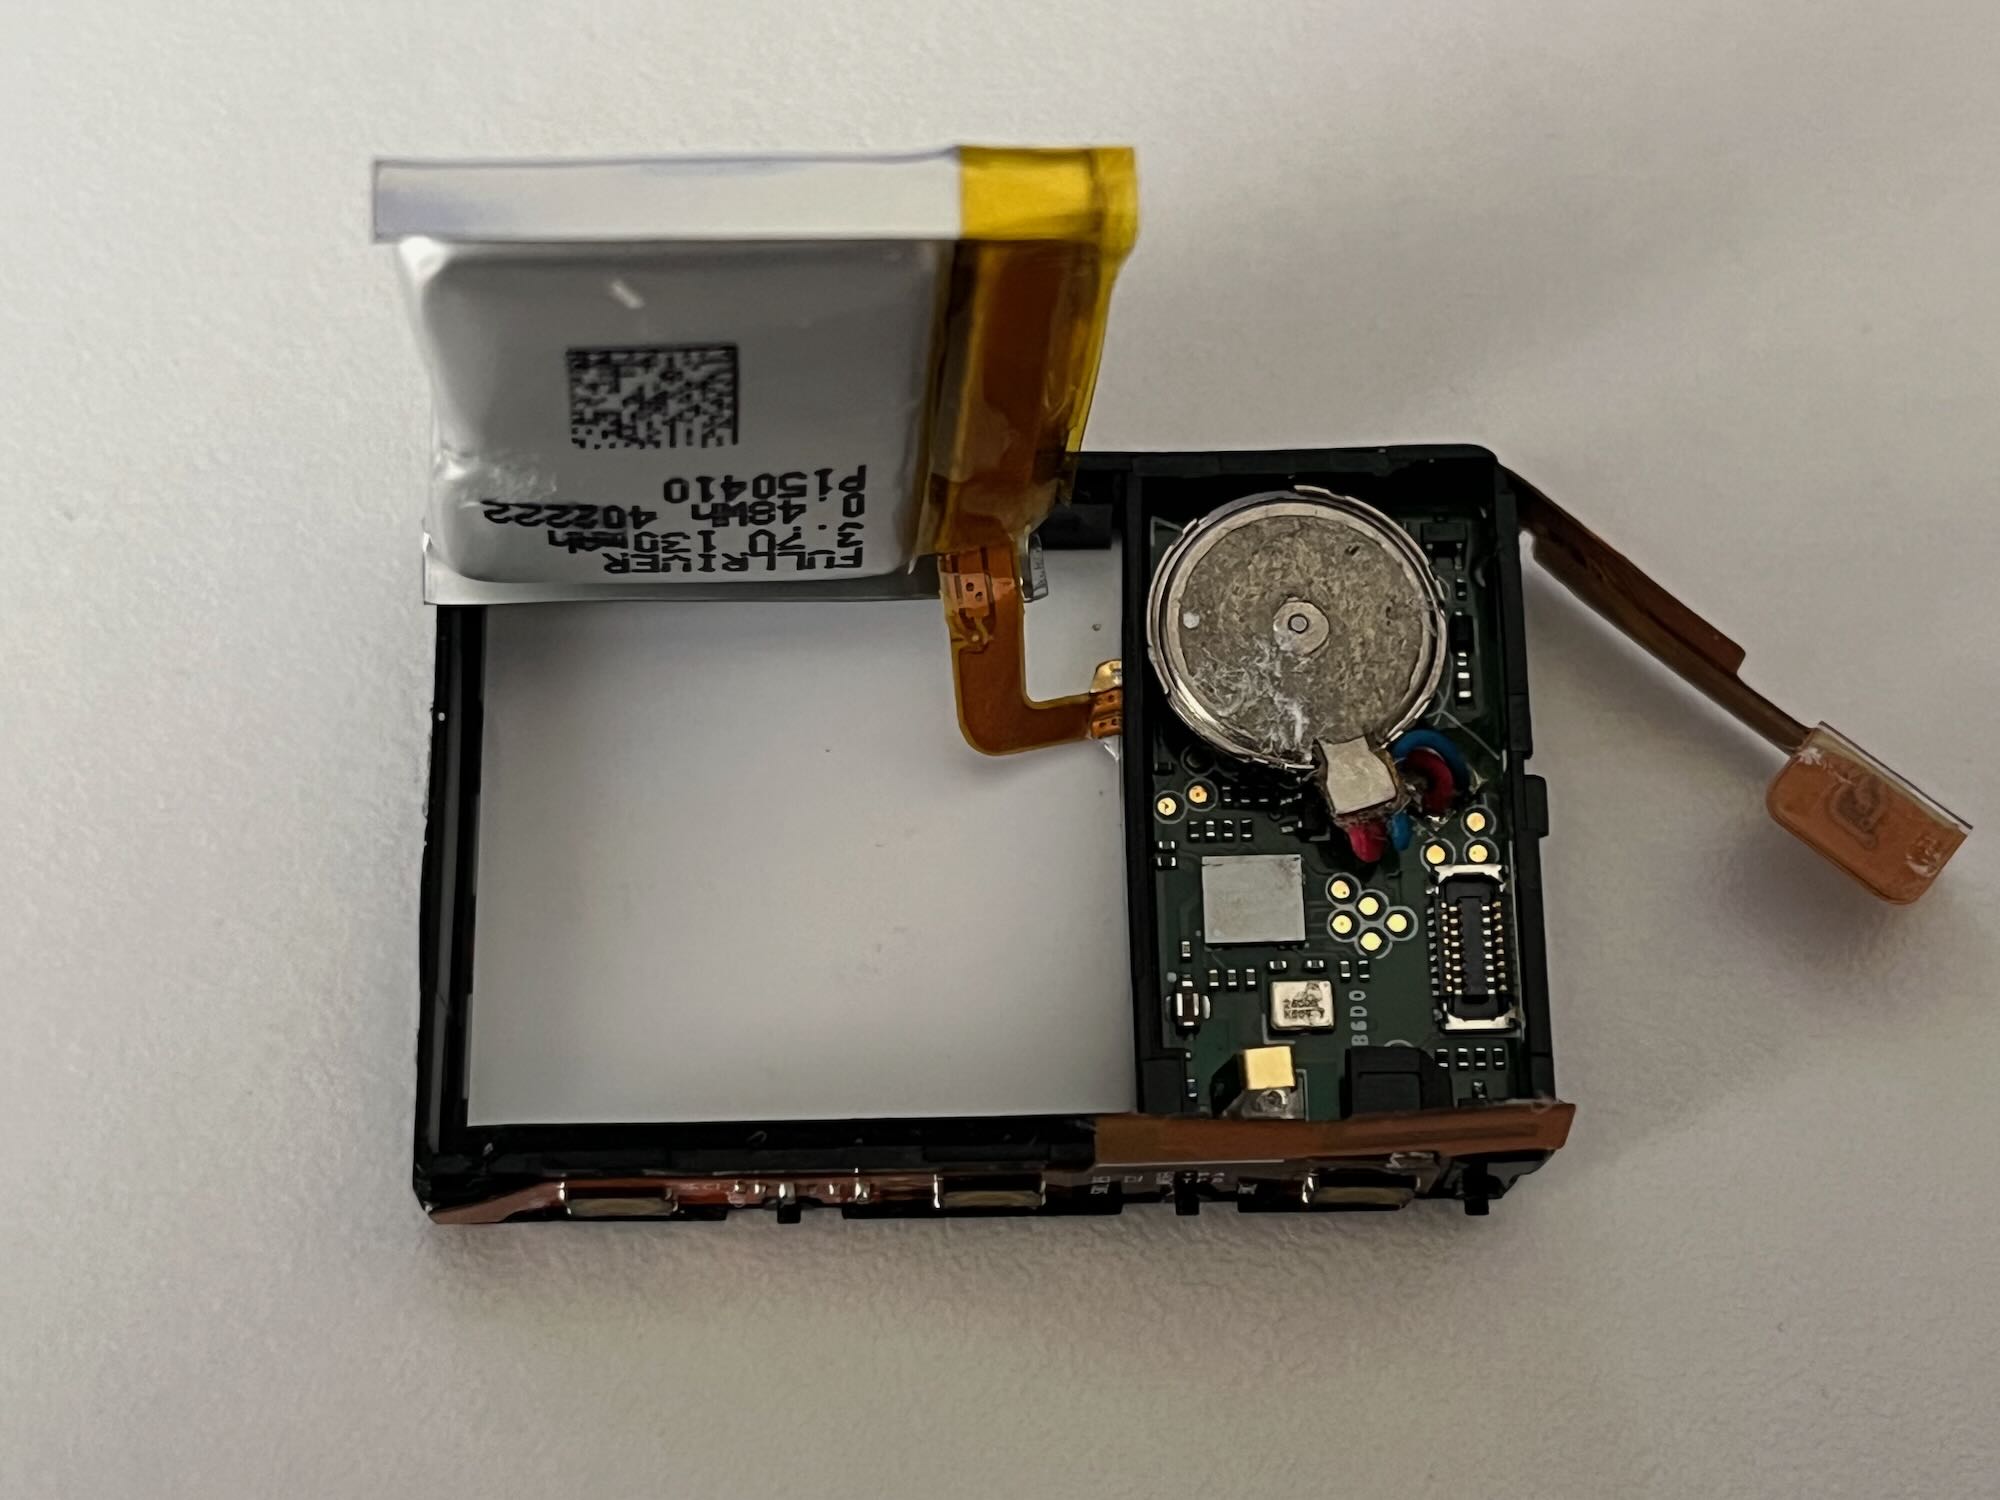
Use a pair of flush cutters or scissors to cut the battery flex cable, then remove the battery.
Use a plastic spudger to pop up the flex cable connector, which is located near the haptic motor. Optionally, you can also bend the antenna part of the flex cable up and out of the way; it uses a simple spring-loaded connection.
Next, you’ll need to remove the inner assembly, which consists a flex cable around the outside, a plastic frame, the PCB, and the backlight diffuser. Flexing it inwards at various points will help release the 5 or 6 clips, which is easier with the battery removed. Use a pointed spudger or plastic tool between the watch body and inner assembly to release the clips and work it out. Note: This differs from Paul’s video quite a bit; he pries it out with a metal tool from the bottom. I did this with another watch but I just don’t love it as a strategy. I need to do my clip-release method on another watch to make sure it works.
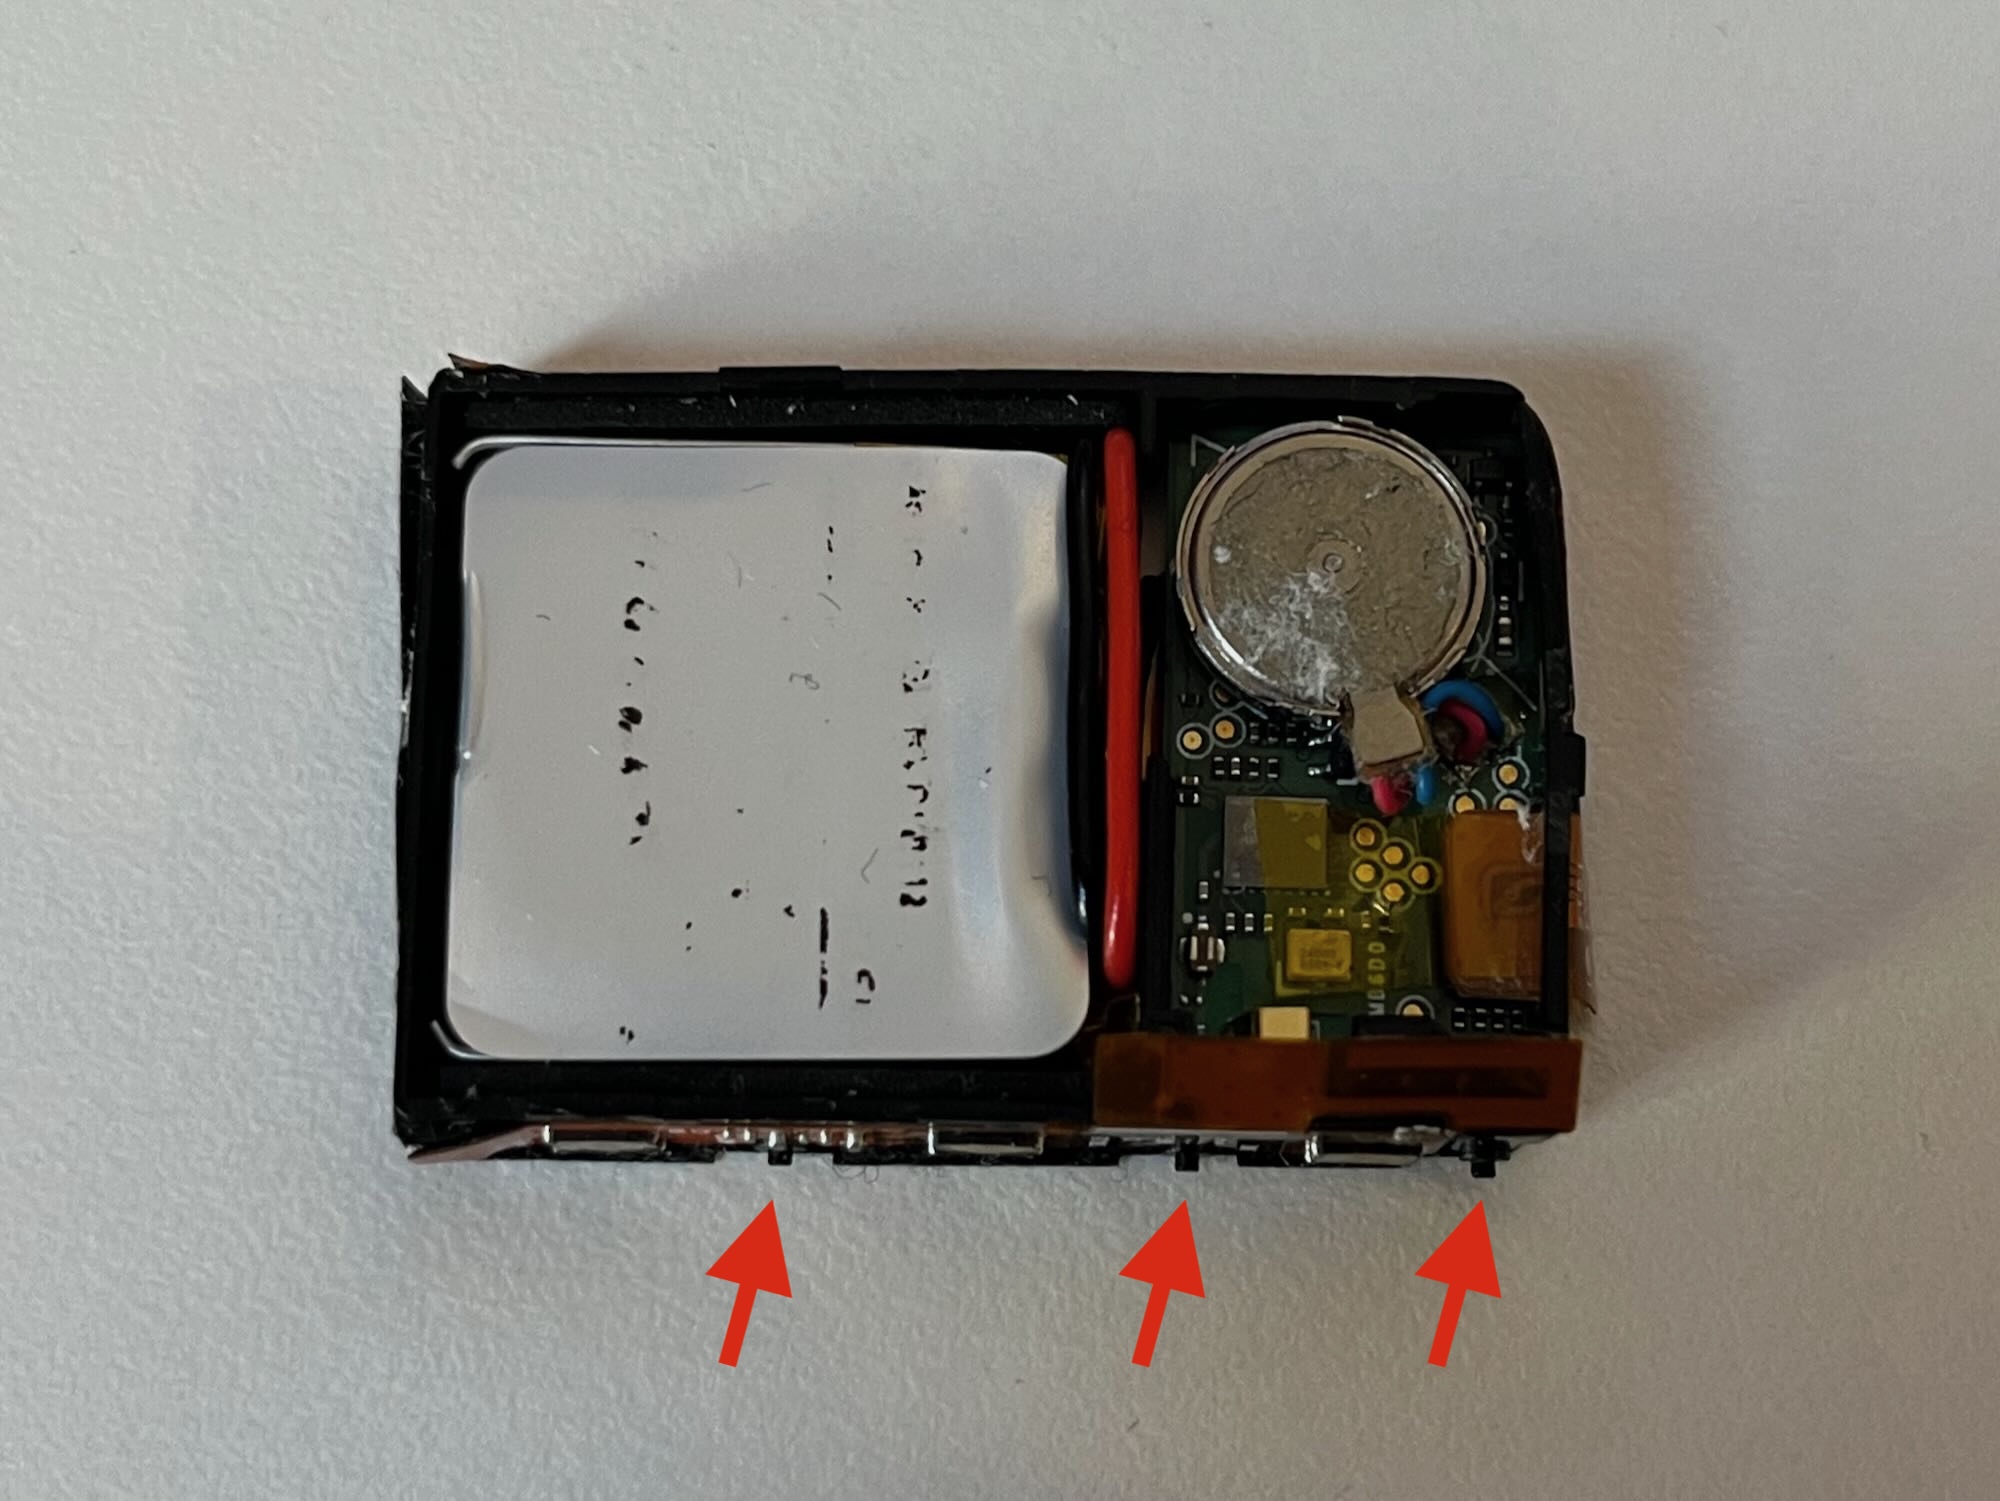
3 of the clips along one side. There are either 2 or 3 more on the other side.
This is an example watch that I purchased for parts, which had strangely been glued back together.
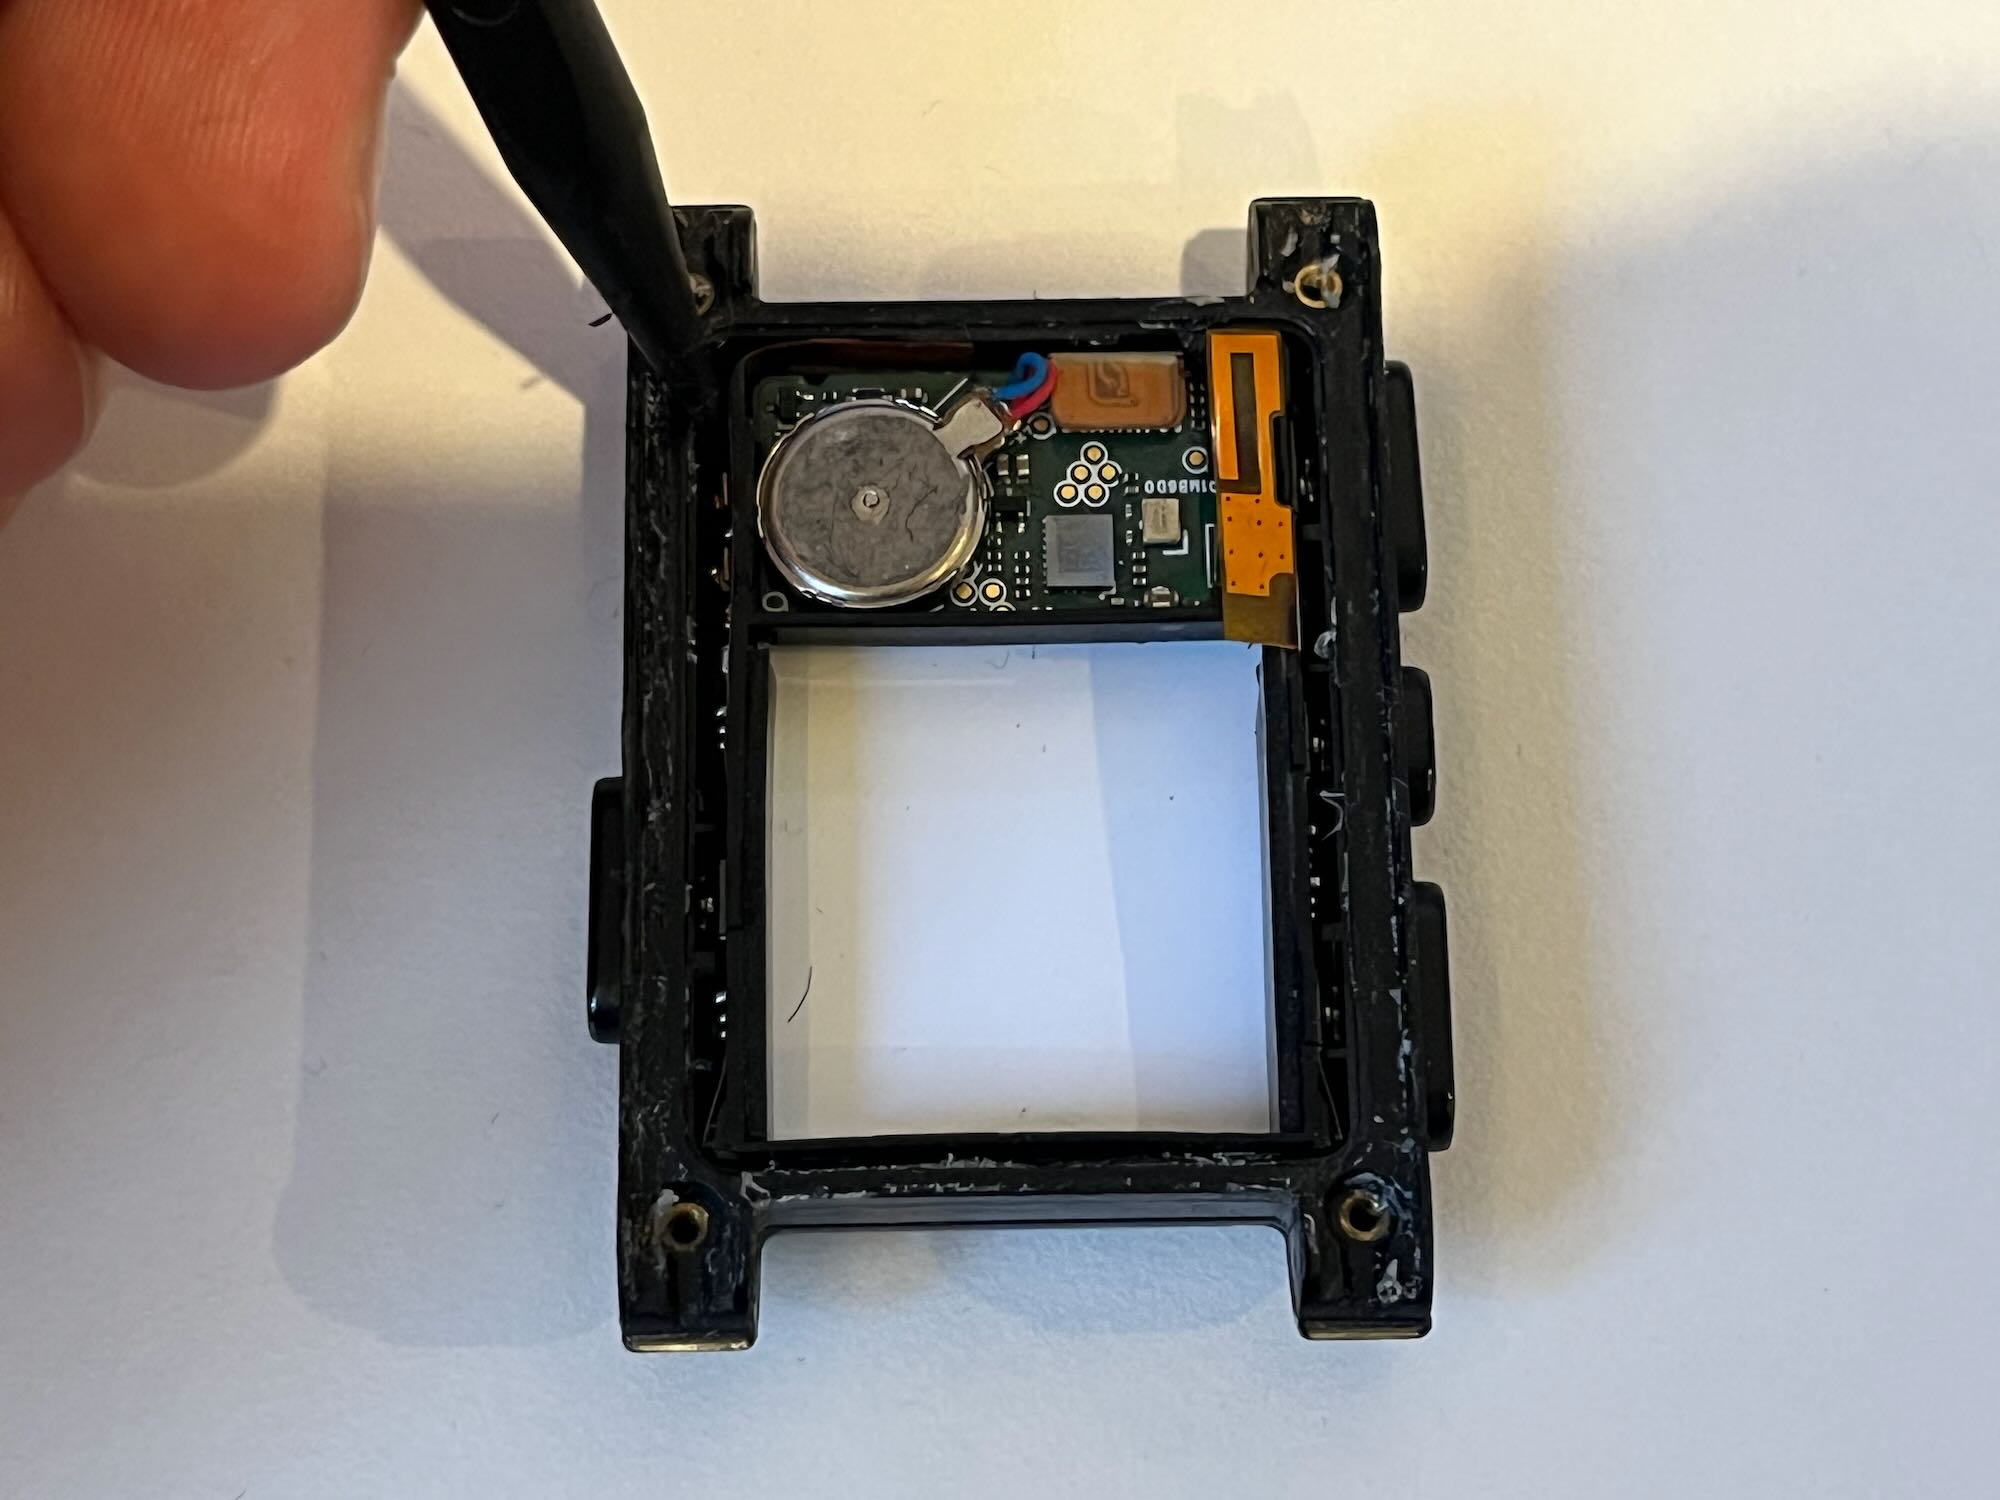
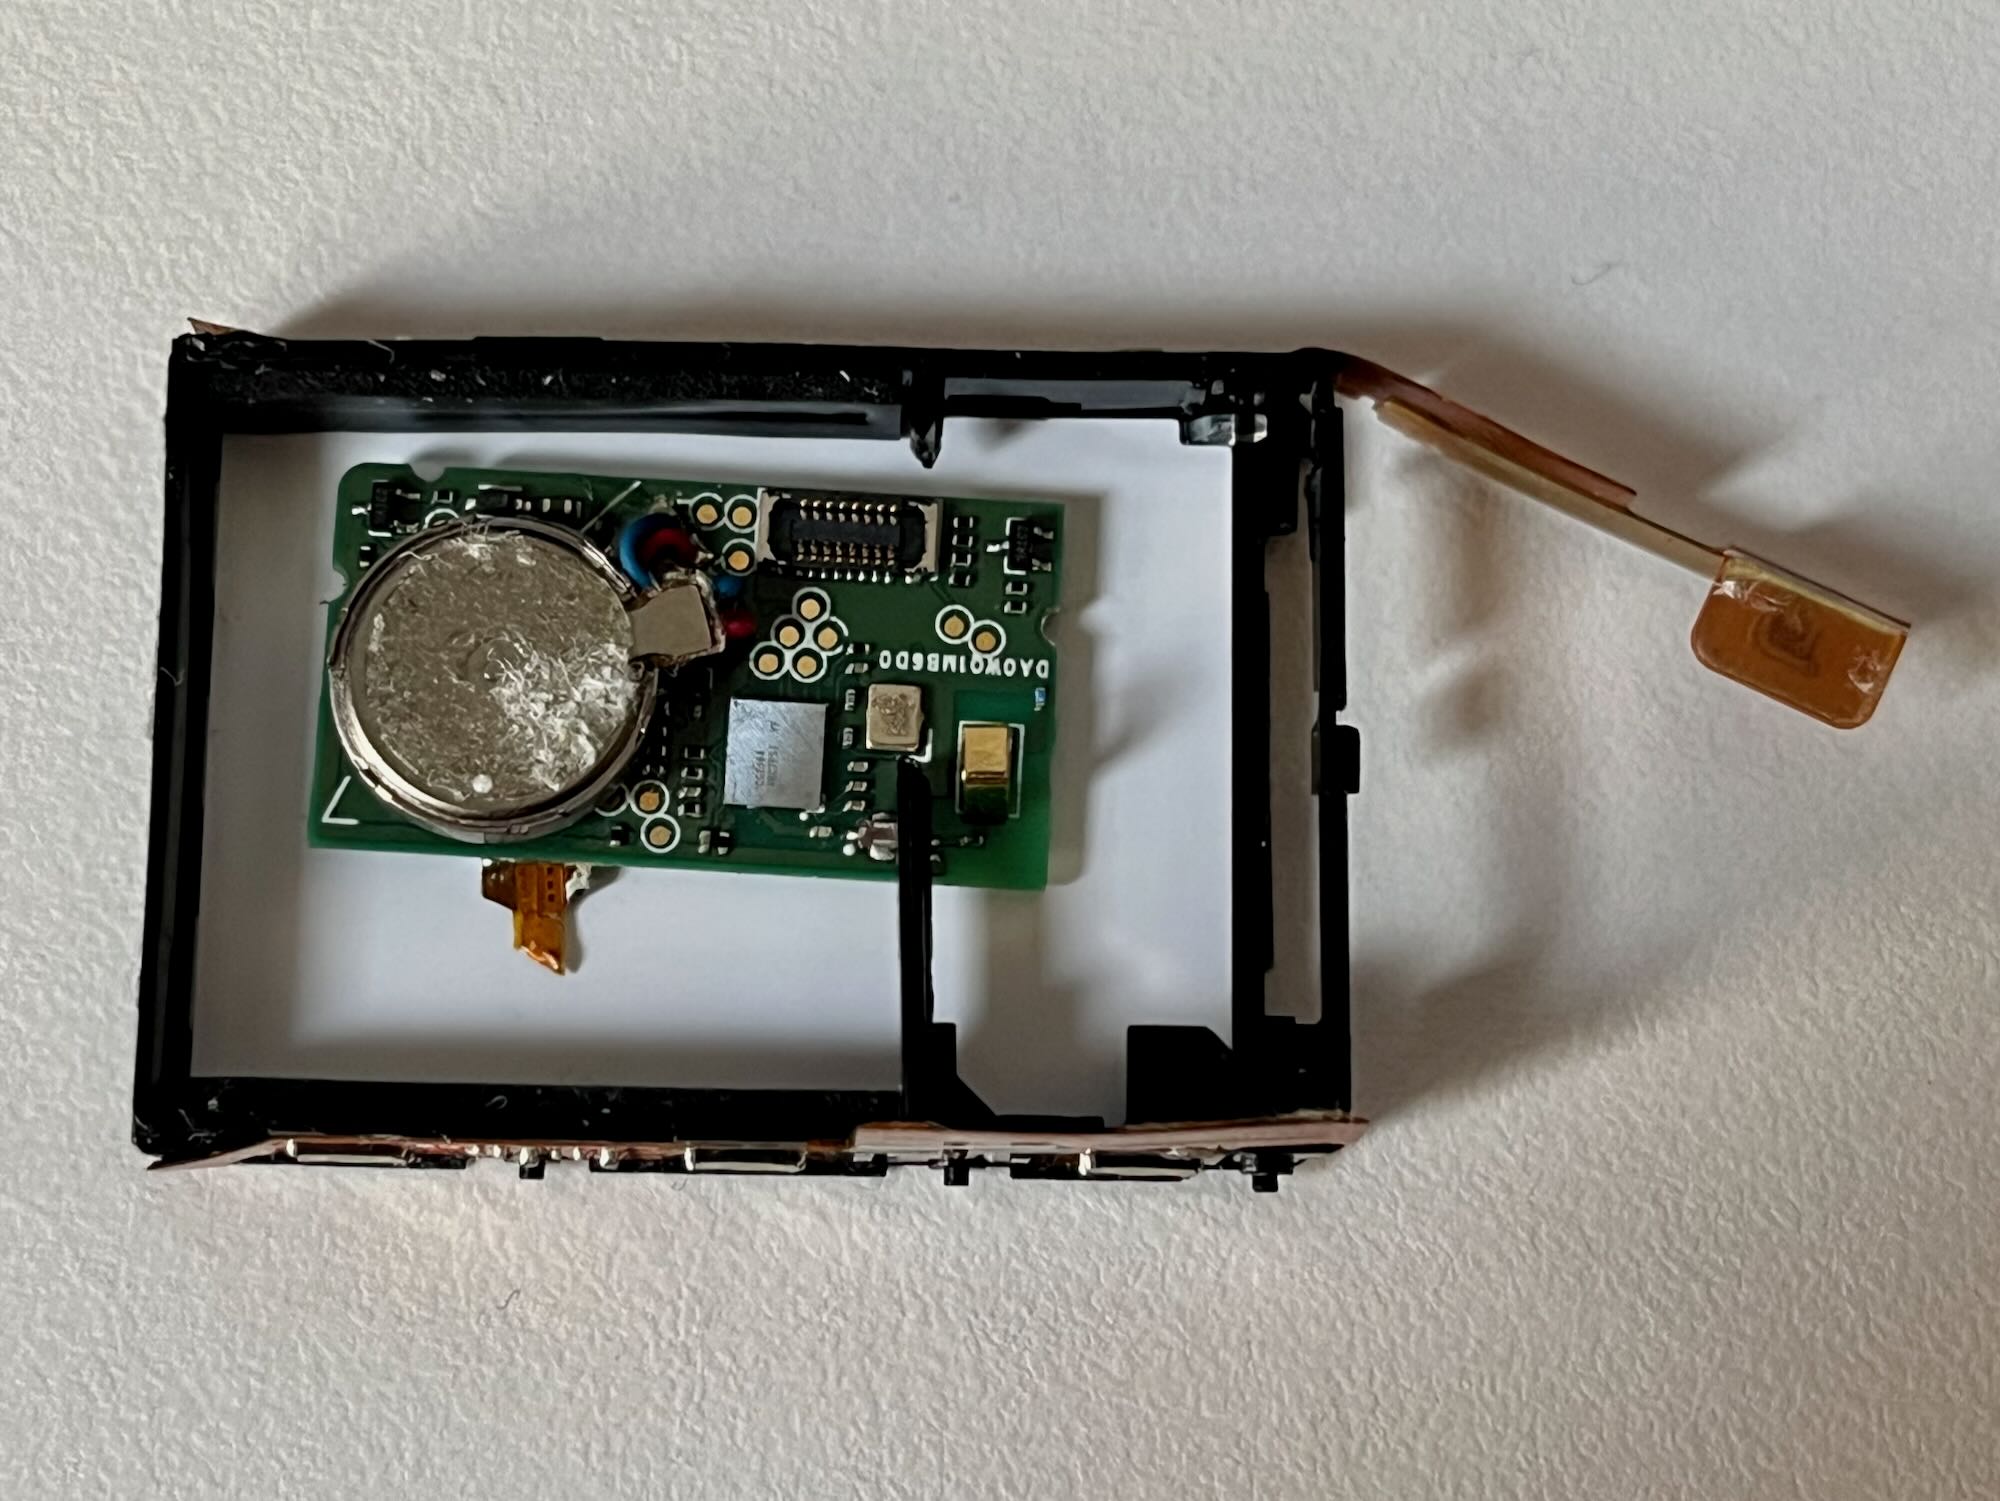
As you remove the inner assembly, the silicone “Zebra strip” that connects the circuit board to the screen will probably fall out. Make note of where it comes from.
With the inner assembly removed, place it backlight-diffuser-down on a soft surface.
Through the middle of the plastic frame is a brace. Cut about half of it away with flush cutters, which will allow you to rotate the board counter-clockwise and remove it from the inner assembly. The frame will flex outward a bit but it should be okay.
With the circuit board removed, use a pick or hobby knife to scrape away any glue or coatings from the battery flex cable solder joints. Getting these clean is critical, make sure all of the residue is removed!
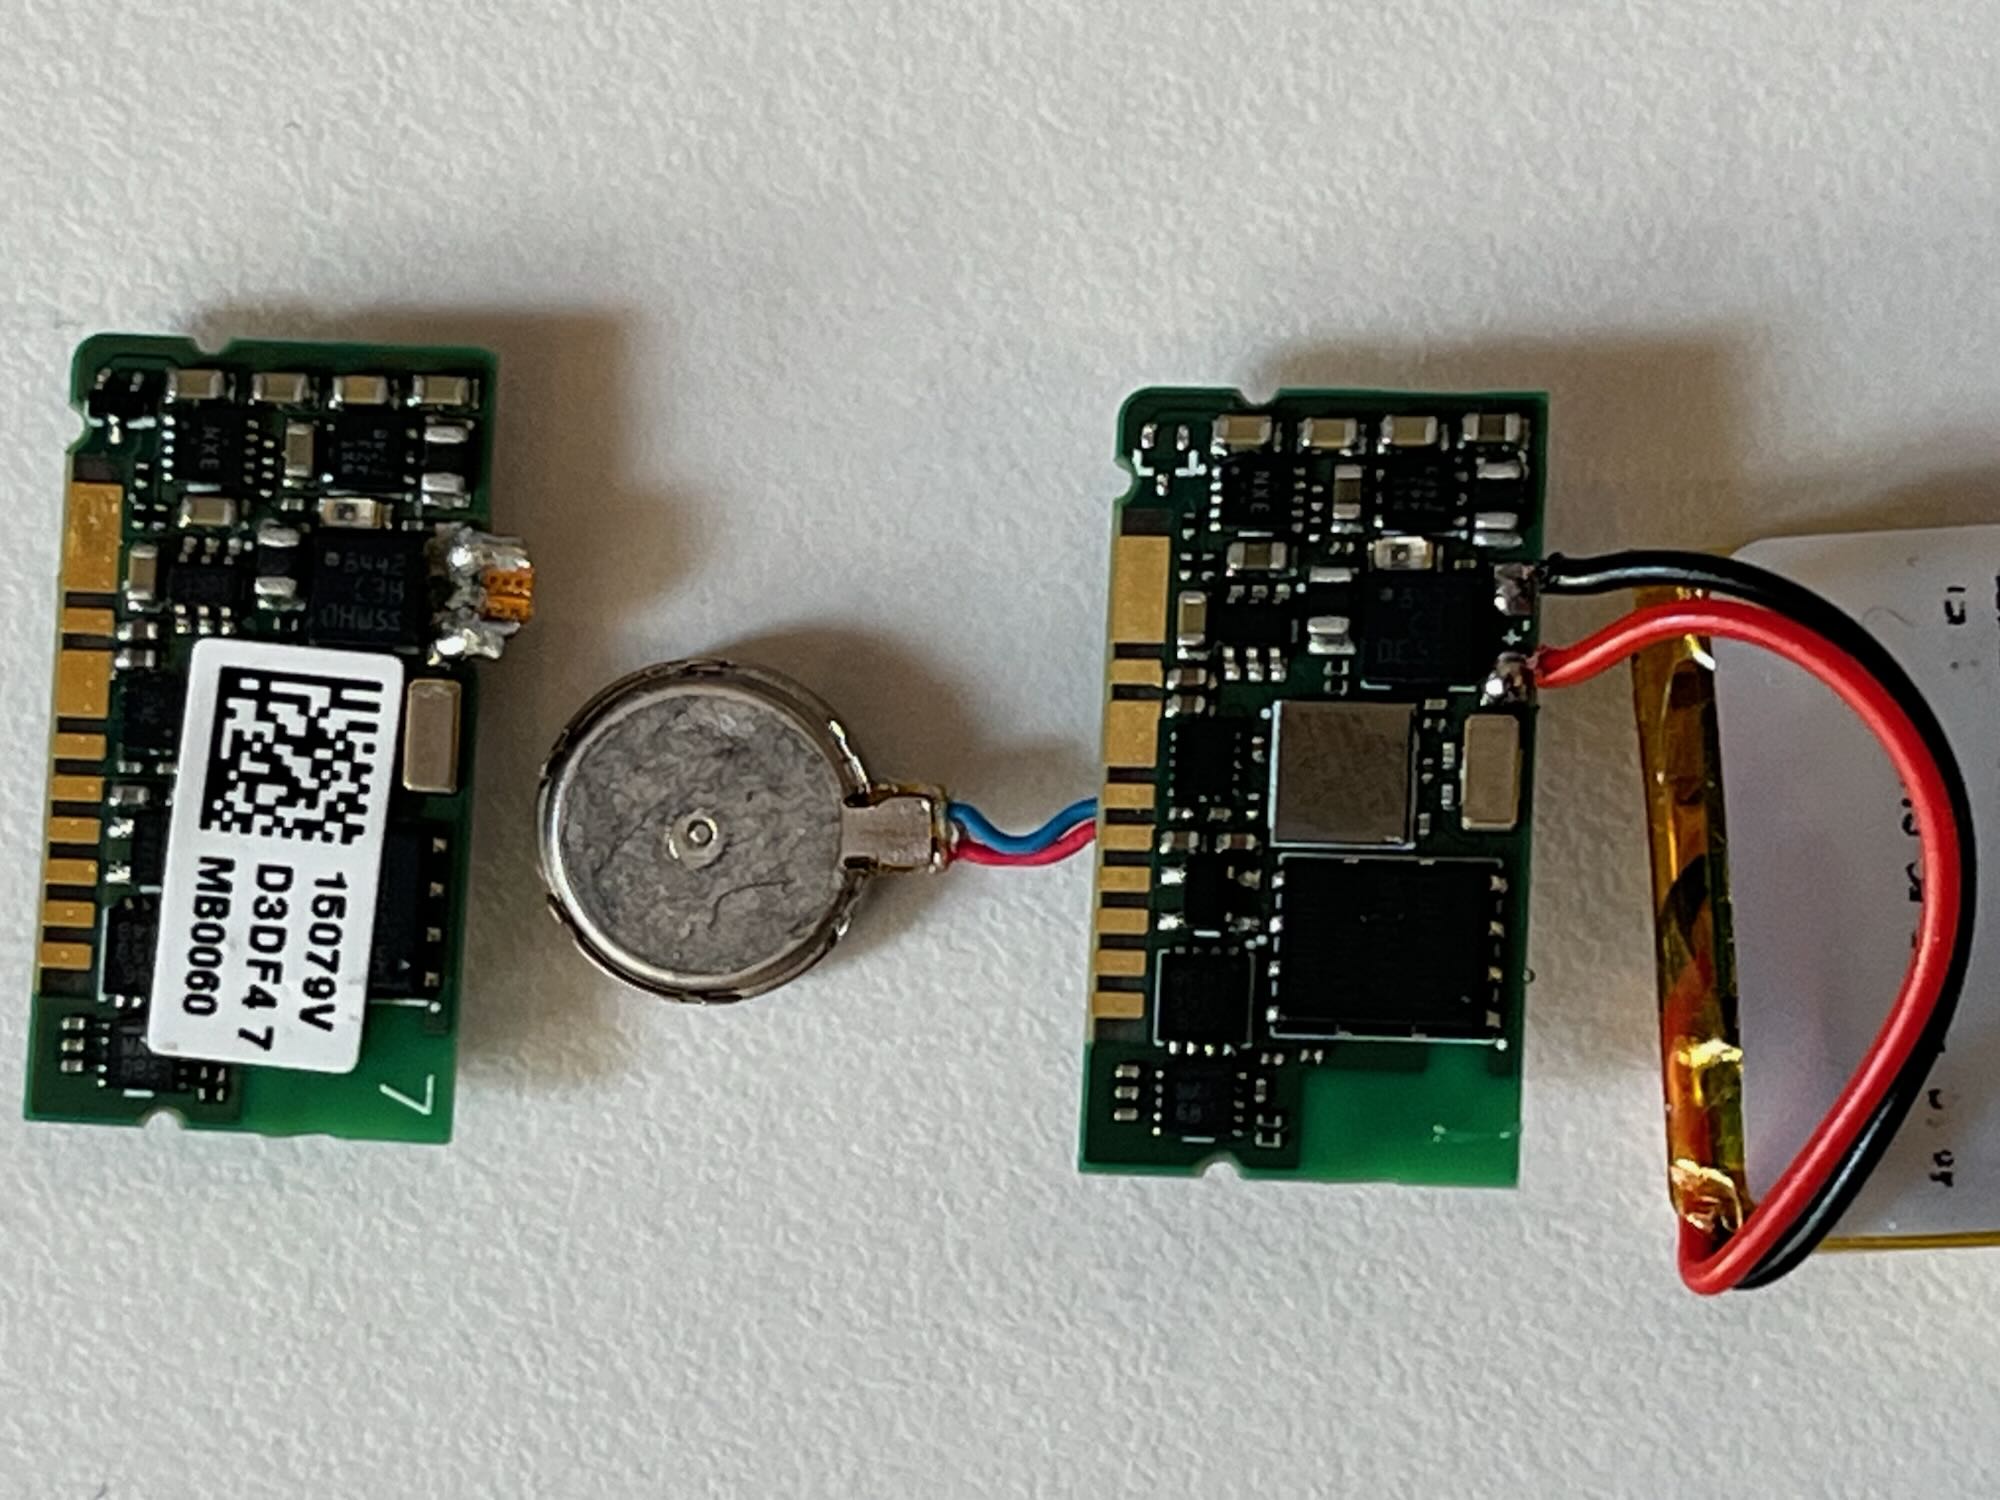
Either desolder the flex cable and solder in the battery wires, or solder the battery wifes right to the top of the flex cable. Leaving some leads on the battery is okay, there is actually enough space inside to fold them up. Here’s an example of one Pebble Classic circuit board with the ribbon intact, and another with the ribbon removed.
Reinstall the circuit board the opposite way that it came out: placing it inside the inner frame, rotating it clockwise, and settling it into place.
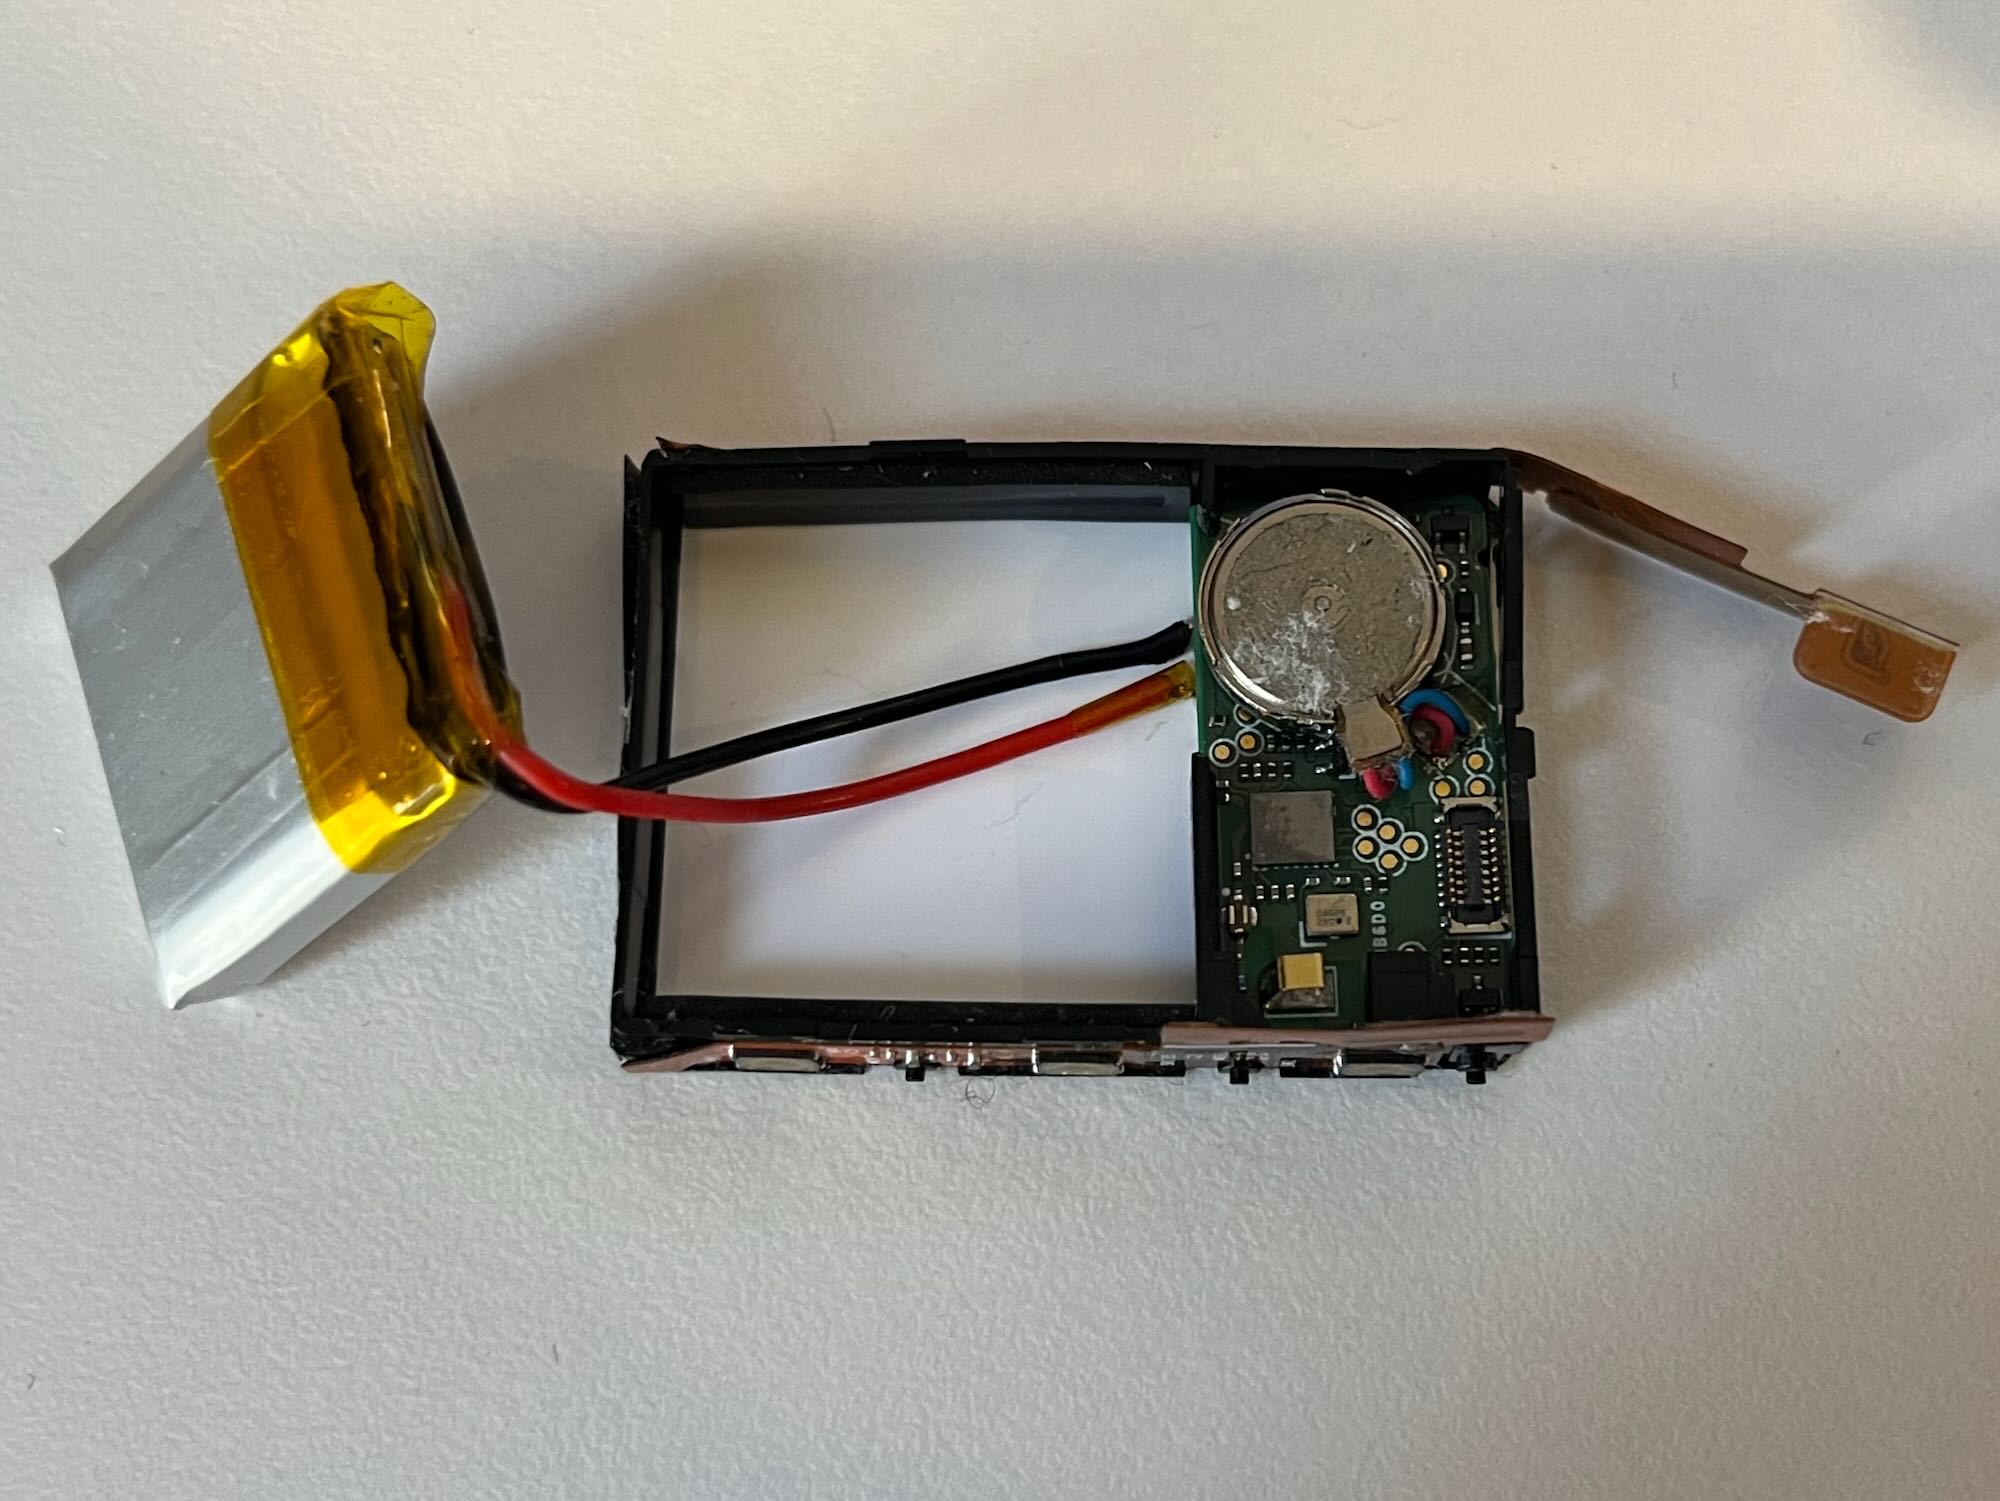
Neatly fold the wires between the battery and circuit board, and gently push the battery into place.
Reconnect the flex cable. Note: I used some kapton tape to hold the connector down, but on reassembly noticed that the back cover has a small tab to hold the connector in place, so I don’t think the kapton tape is nescessary.
Place the Zebra strip back on the inner frame assembly, and place the inner frame assembly back on the work surface, battery-side down.
Carefully place the watch body (face-up) down on top of the inner frame assembly, and push the two parts together, making sure the Zebra strip stays put as much as possible. Warning: When you flip the watch back over to fully seat the inner frame assembly inside the watch body, pay very close attention to the spring connections between the inner frame assembly and the watch body that are used for charging, you really don’t want to bend those!
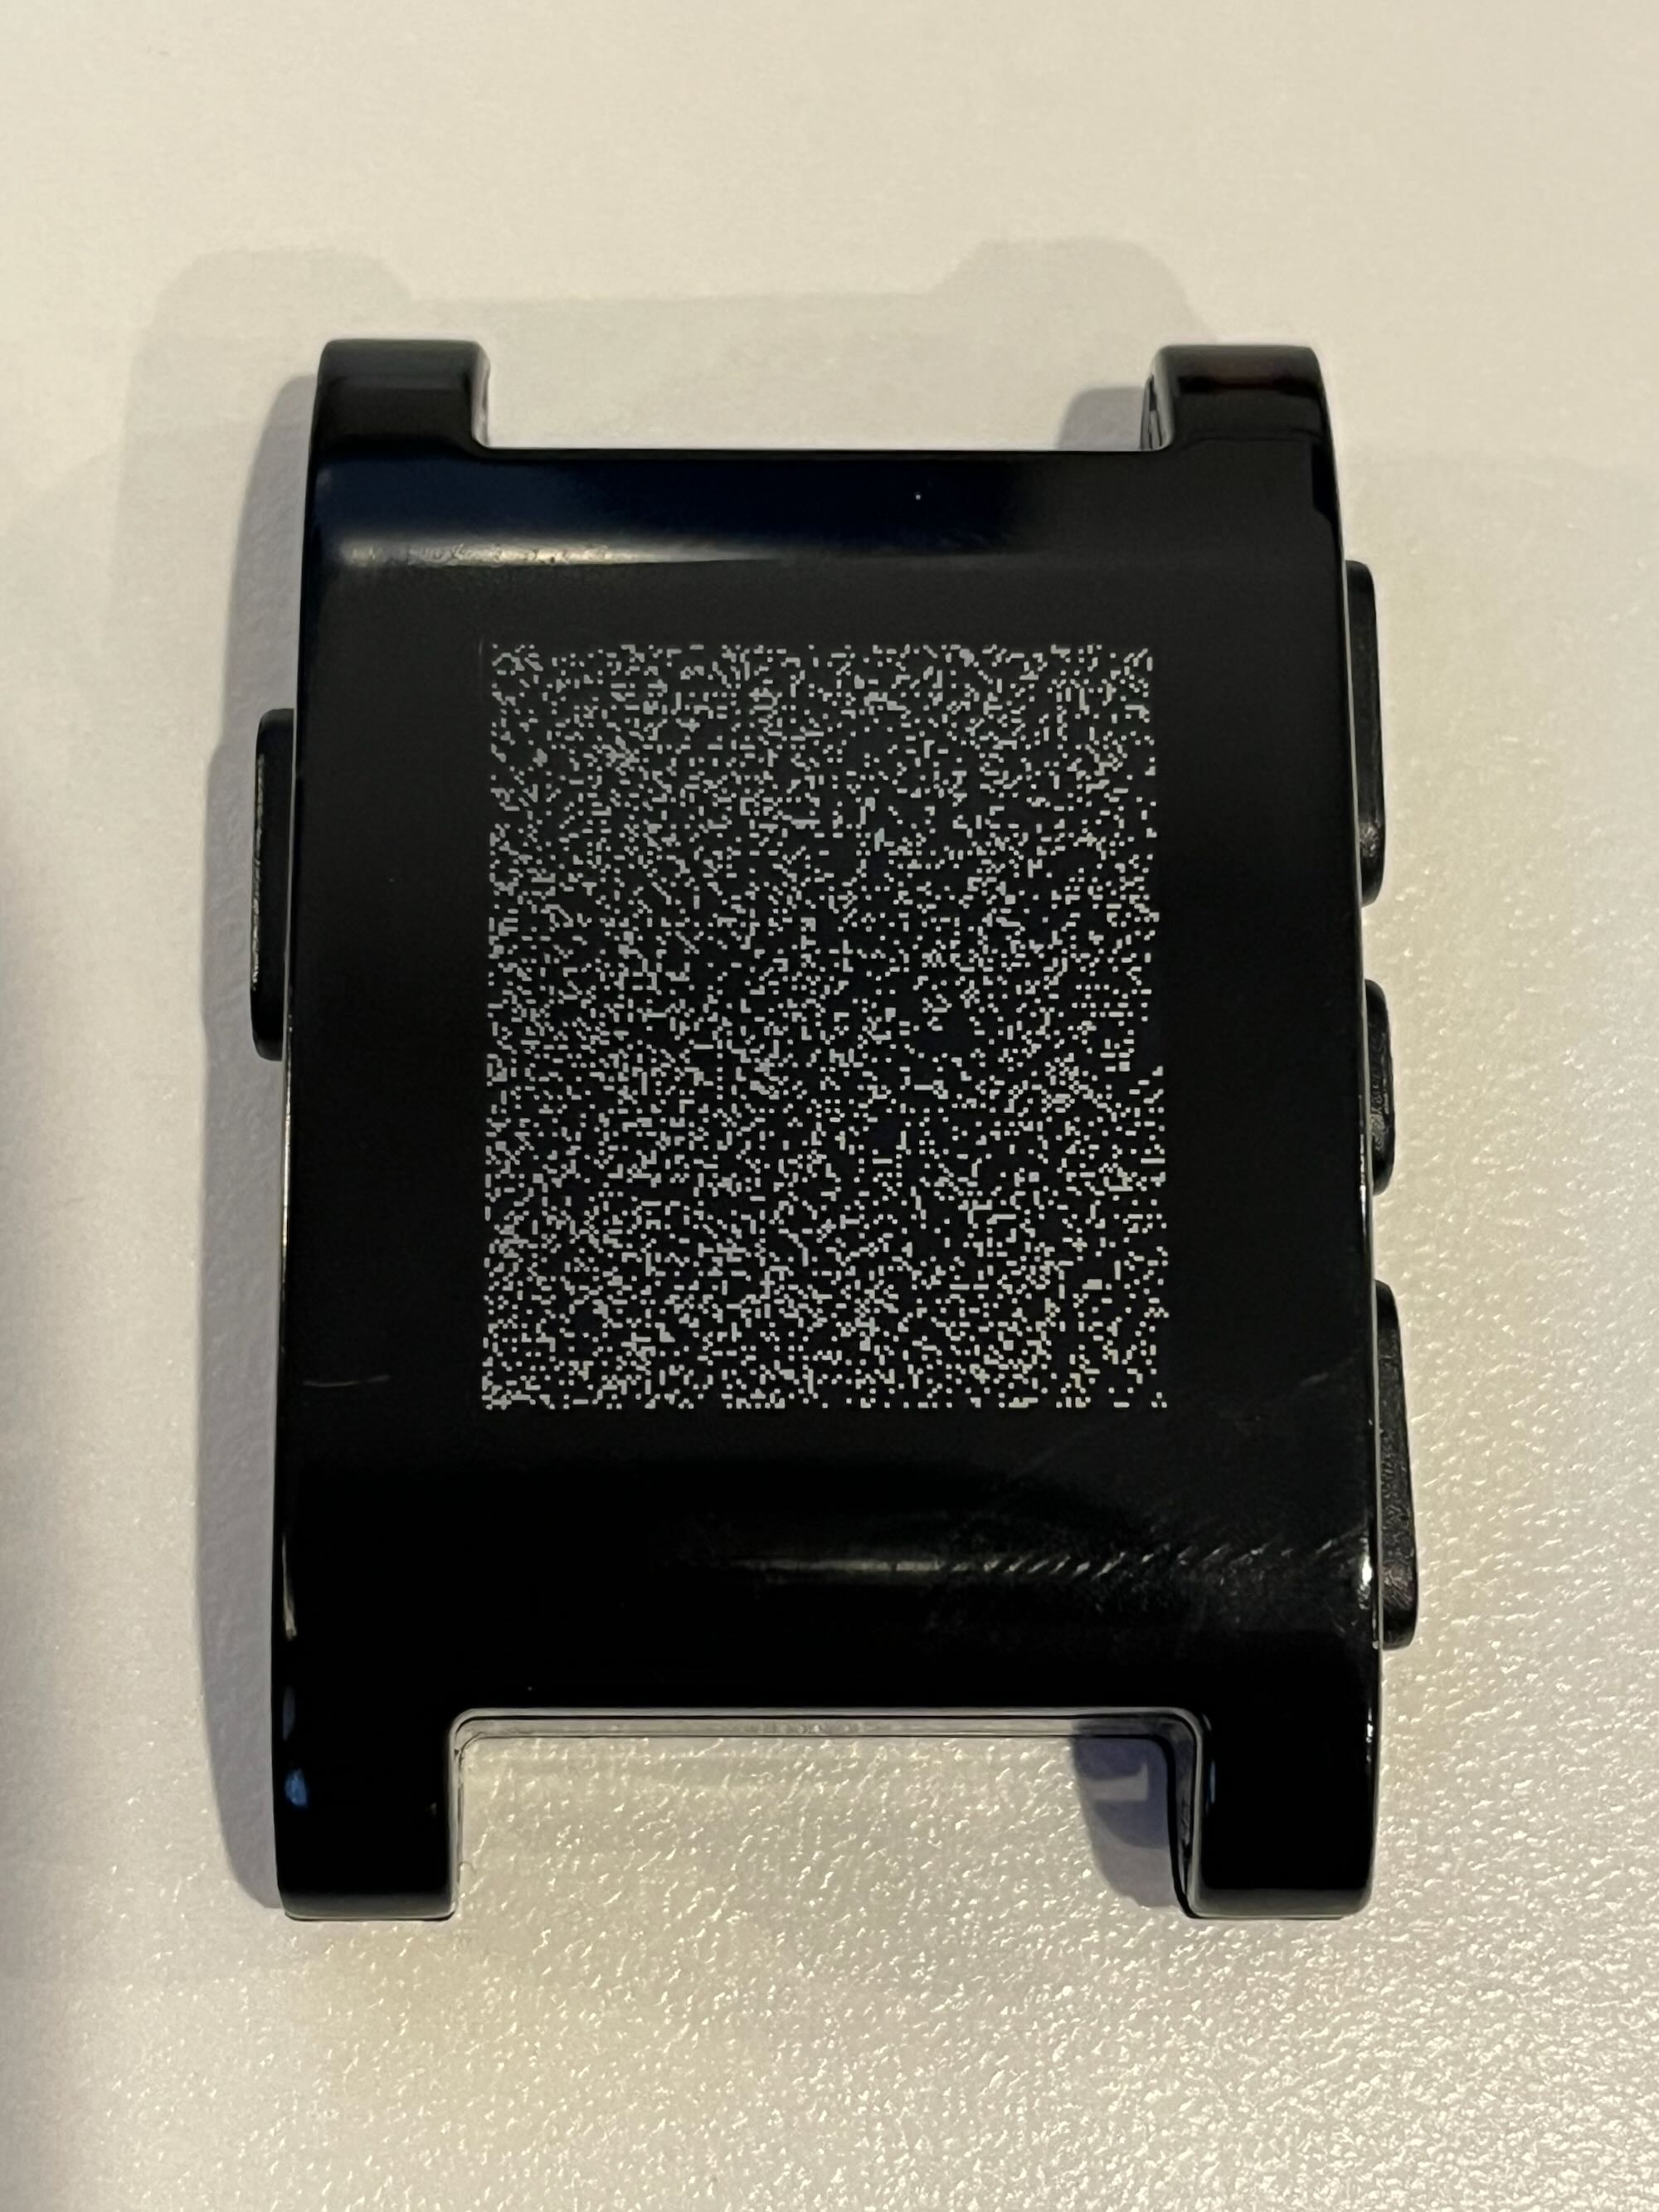
You should now be able to power on the watch, and test it! If your attempt is anything like mine, you might see some garbage on the screen, like this. You might be tempted to take the watch back apart, but don’t! Instead, press Back, Up, and Select simultaneously to reboot the watch.
If everything is working, reinstall the rubber gasket on the back, and reinstall the screws. I tighten them in an “X” pattern just like we do for cylinder heads on engines.
I didn’t have to do this, but if you get error
fe504502, wait for the battery to completely discharge. Then, hold Back, Up, and Select simultaneously as you reconnect power. This should completely reset the watch, and fix the problem.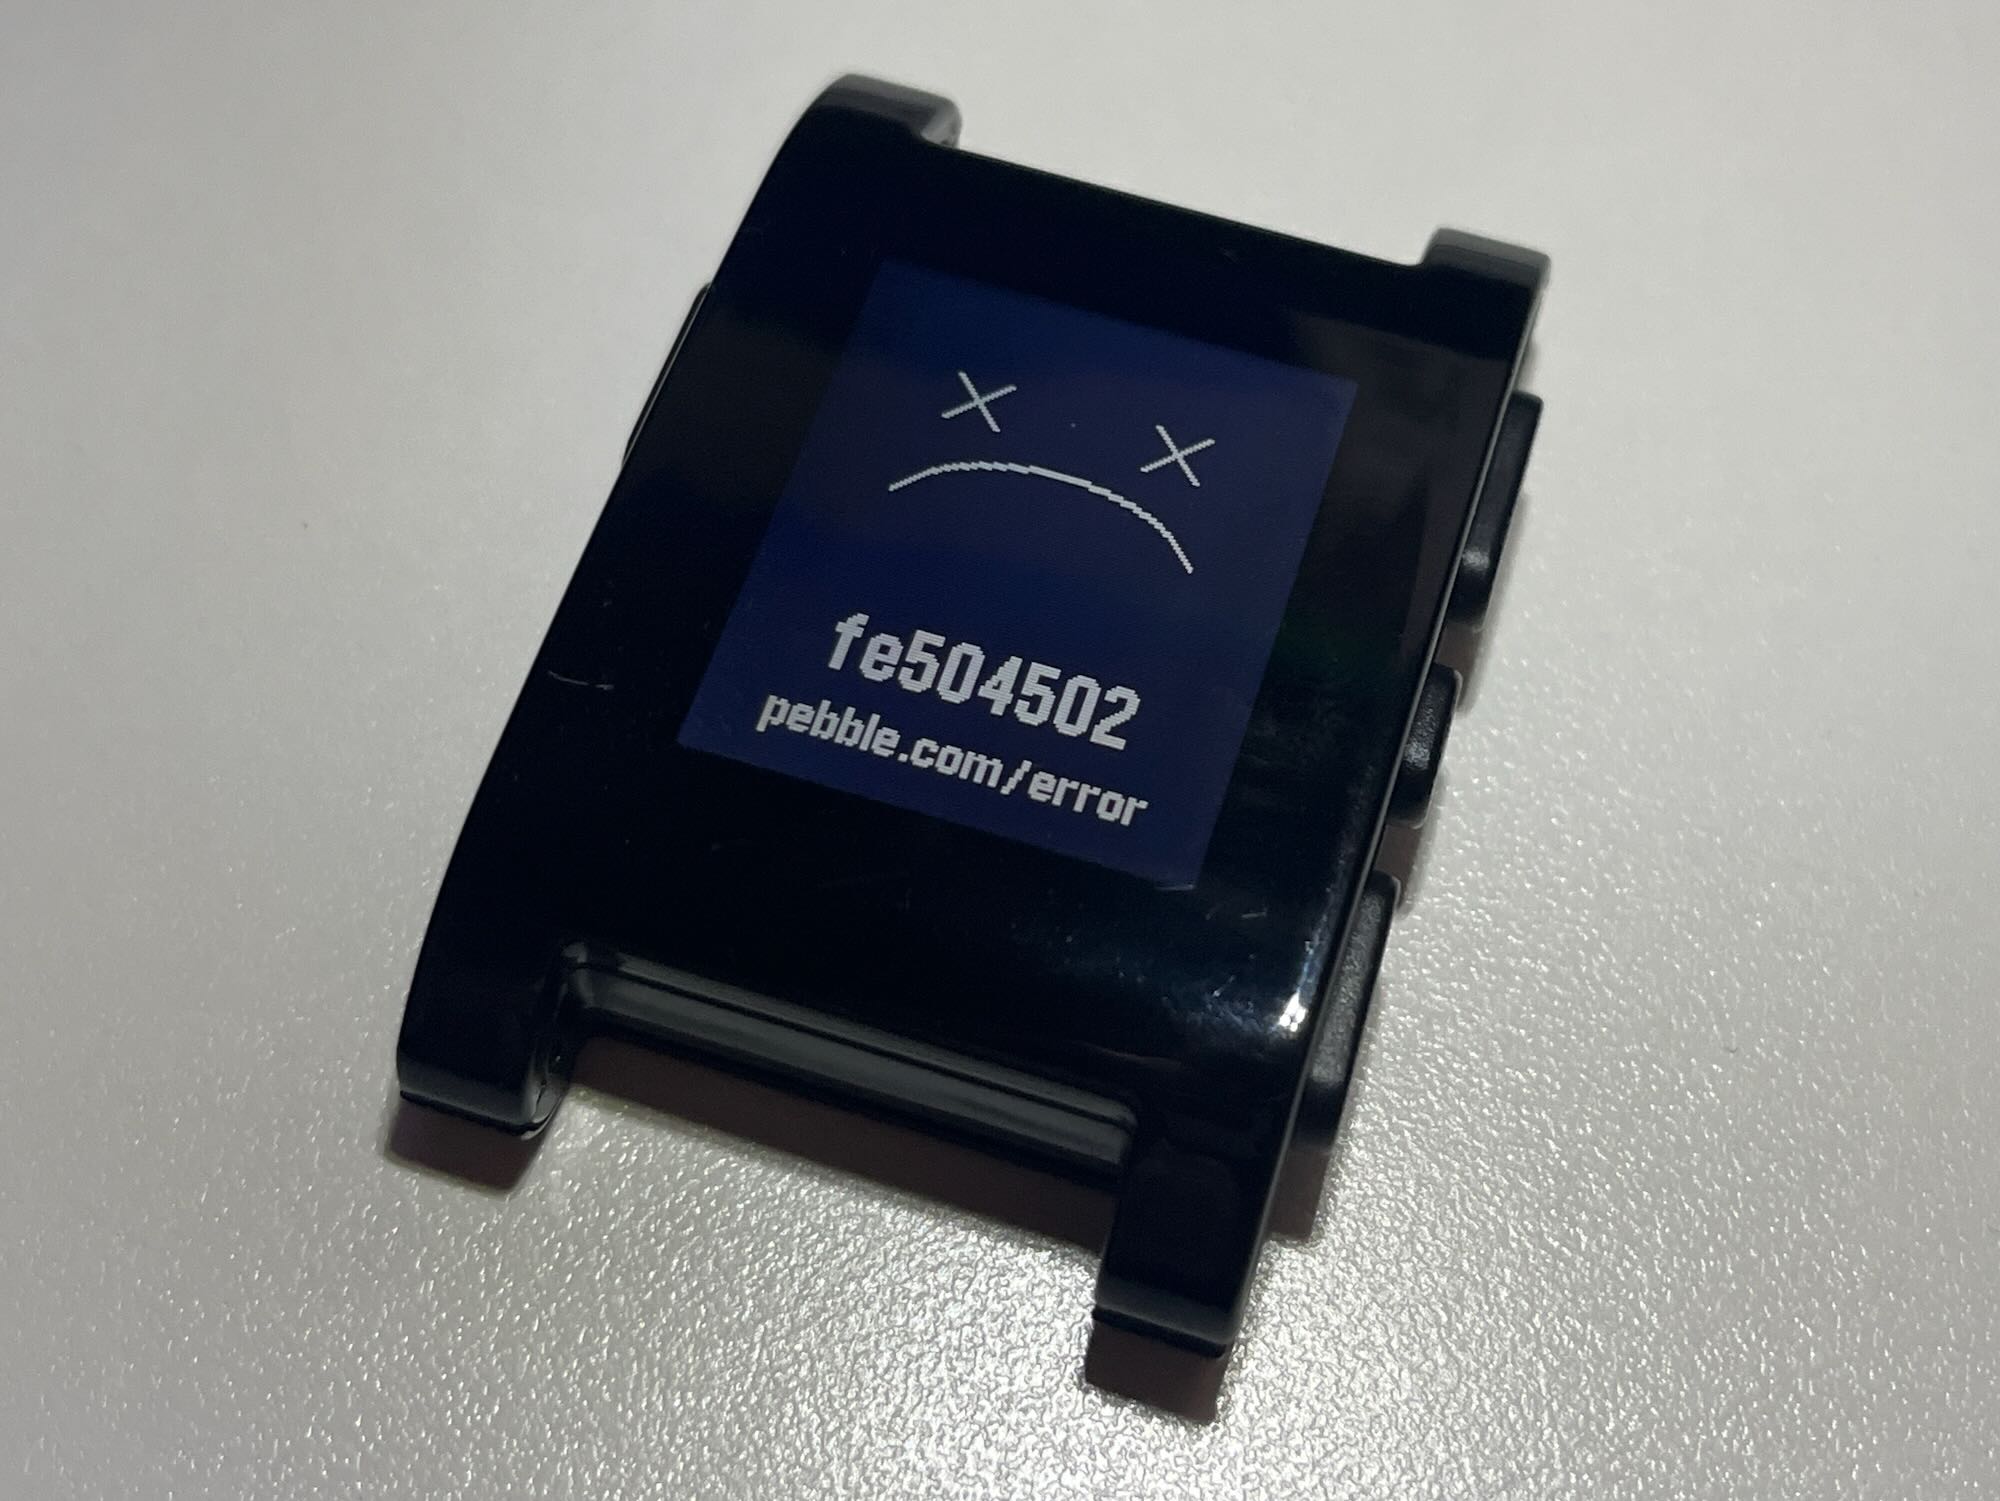
After replacing the battery on my watch, I am seeing about 4 days of battery life with heavy use (lots of messing with it). With normal use, 6 days seems reasonable. Not bad for a 12-year-old smartwatch!